
Table of Contents
- What Determines How Long a 3D Print Takes
- Model Size, Complexity, and Print Orientation
- Layer Height, Infill Density, and Print Speed Settings
- Average Print Times: Small Objects vs. Complex Designs
- How to Speed Up 3D Prints Without Ruining the Result
- Using a 3D Print Time Estimator Before You Hit Start
- Hardware, Nozzle Diameter, and Actual Throughput
- 3D Printing Post-Processing Time: The Part Nobody Counts
- Conclusion
- Frequently Asked Questions
Last Updated: September 16, 2026
What Determines How Long a 3D Print Takes
Most 3d prints take roughly 30 minutes to several hours, depending on how much plastic the machine lays down and how fast it can lay it. Duration is the sum of model geometry, slicer settings, and machine capability, not a fixed number tied to the object's size on screen.
Below, we break down each variable, give realistic ranges, and show you how to speed up 3d prints without turning a clean model into a stringy mess.
Model Size, Complexity, and Print Orientation
Size sets the ceiling on print duration, but complexity decides how close to that ceiling you land.
Three factors matter most here:
- Volume of extruded material. More plastic means more passes, and more minutes.
- Surface detail. Fine features, small holes, and thin walls slow the nozzle, which can't sustain top speed through short segments.
- Print orientation. Rotating a model changes support needs and stack height. Tall prints take longer even at identical volume.
Layer Height, Infill Density, and Print Speed Settings
Layer height is the most powerful lever you control: halving it roughly doubles layer count and print duration.
| Setting | Effect on Print Time | Typical Trade-off |
|---|---|---|
| Layer height | Lower height, longer print | Smoother surface finish |
| Infill density | Lower density, shorter print | Weaker internal structure |
| Print speed | Higher speed, shorter print | Risk of under-extrusion |
| Nozzle diameter | Larger nozzle, shorter print | Less fine detail |
| Wall thickness | More walls, longer print | Stronger shell |
Average Print Times: Small Objects vs. Complex Designs
Small objects usually finish in 30 minutes to 2 hours; complex designs commonly run 4 to 12 hours or more. The gap comes from layer count and travel moves, not footprint.
| Model type | Approx. dimensions | Legacy bed-slinger (e.g., Ender-class) | Modern high-speed printer (e.g., Klipper-based) | Resin (SLA) equivalent |
|---|---|---|---|---|
| Keychain / token | 40 × 40 × 5 mm | 20-35 min | 10-18 min | 40-70 min (plus wash/cure) |
| Small figurine | 60 × 60 × 80 mm | 1.5-2.5 hr | 45 min-1.5 hr | 2-4 hr |
| Articulated desk toy | 100 × 80 × 60 mm | 3-5 hr | 1.5-2.5 hr | 4-7 hr |
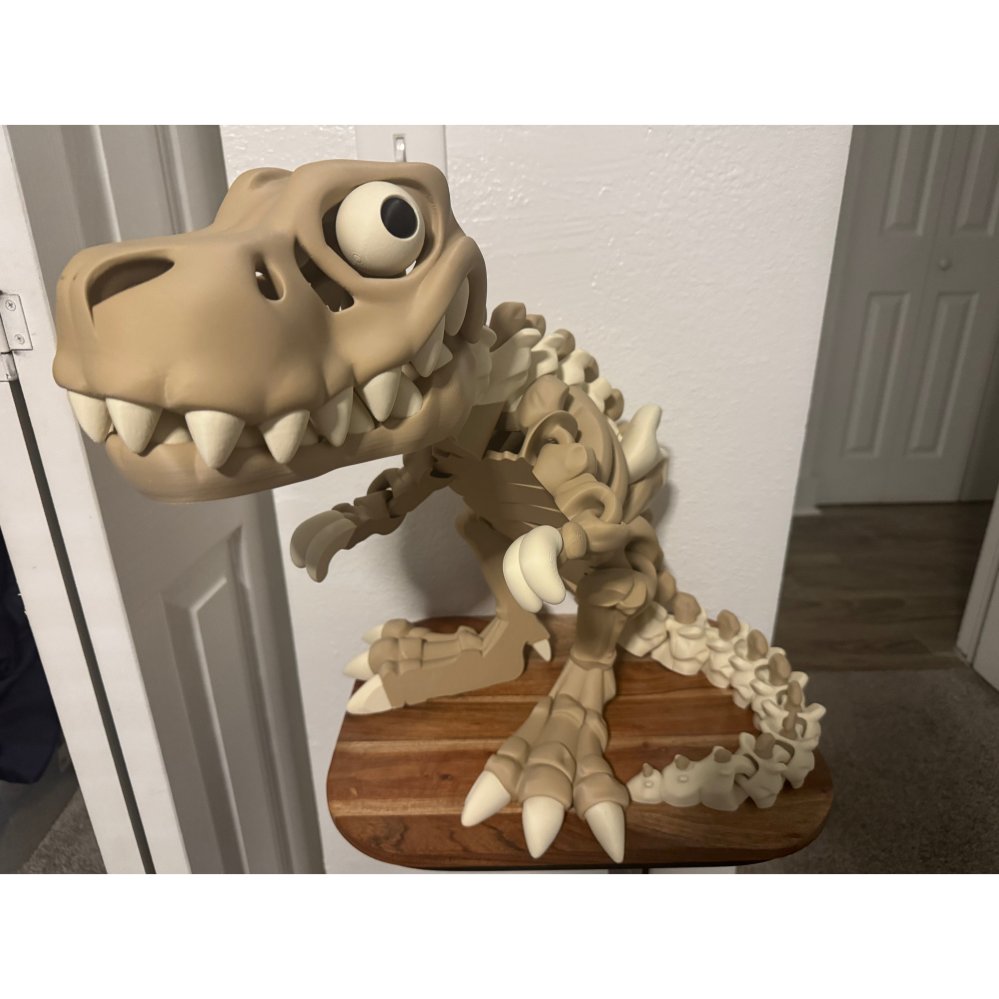
| Articulated dragon / skeleton | 250 × 150 × 100 mm | 9-14 hr | 4-7 hr | Not practical (build volume) |
| Large display bust | 150 × 150 × 200 mm | 12-20 hr | 6-10 hr | 8-14 hr |
| Functional bracket / enclosure | 120 × 120 × 60 mm | 4-7 hr | 2-3.5 hr | Rarely used |
What Changes When You Print Something Big
Scale changes the math in two directions: a larger model needs more material and layers, and it more often needs support structures that add time on top of the model itself.

Why the Same Model Takes Different Times on Different Machines
Two printers running identical g-code can finish hours apart because their motion systems aren't equivalent. A legacy bed-slinger with a heavy moving bed and Marlin firmware typically caps real acceleration around 500-1,000 mm/s², so the nozzle spends most of a short segment ramping up and never reaches the slicer's speed number. A modern Klipper machine with input shaping can push 5,000-10,000 mm/s² and actually hit the requested speed on the same toolpath.
Time-Lapse Video Is Not Print Time
Social media makes printing look instant because creators shoot time-lapses at one frame every few seconds and play them back at 30 fps. A 6-hour print compressed that way runs about 15 seconds on screen. Treat any time-lapse print-time claim as unverified, the video shows the model succeeded, not how long it took.
How to Speed Up 3D Prints Without Ruining the Result
Most guides say raise layer height and drop infill. That's correct but incomplete: on a modern printer the biggest savings live in acceleration, jerk, and input shaping. Here's the sequence that actually moves the needle, in order of impact.
Tier 1: Settings That Cut Time With Almost No Quality Cost
- Raise acceleration. The most underused lever. Acceleration controls how fast the nozzle reaches target speed, and on short segments it's the real bottleneck. Going from 500 mm/s² to 3,000 mm/s² on capable hardware can cut total time 30-50% on detailed models with no visible change. Raise it in 500 mm/s² steps and watch for ringing before going higher.
- Raise jerk (or junction deviation). Jerk is the minimum speed carried through a corner instead of slowing to a near-stop, keeping the toolhead moving through thousands of tiny direction changes. Typical safe range is 8-20 mm/s on a bed-slinger; too high and corners round off.
- Enable input shaping if your firmware supports it. Klipper and newer Marlin builds measure resonance and cancel it in software, letting you run higher acceleration without ringing, the biggest reason a Klipper printer finishes the same model in half the time of a stock machine.
- Increase layer height from a fine setting to a standard one. Still a large saver, but no longer the biggest on a fast machine.
- Reduce infill density for display pieces that don't carry load.
- Raise travel speed so the nozzle moves faster between features, with almost no quality risk.
- Tune retraction settings so the nozzle doesn't string during faster moves.
- Orient the model to minimize supports and overall height.
- Match nozzle diameter to the job. A 0.6 mm or 0.8 mm nozzle lays wider lines and finishes faster, at the cost of fine detail.
Tier 2: Settings You Should Not Rush
Cooling fan speed and first layer speed should stay conservative, they protect layer and bed adhesion, and rushing them is how prints warp or fail. The same applies to overhang speed: slowing down keeps the underside clean, and the time cost is small next to a failed print.
XXL Flexi T-Rex Skeleton | 36" 3D →
The Flow-Rate Ceiling Nobody Mentions
Every hotend has a maximum volumetric flow rate, the volume of filament it can melt per second. A standard 0.4 mm nozzle on a stock hotend tops out around 10-15 mm³/s. Raise speed and acceleration without checking this and the slicer asks for more flow than the hotend can deliver, leaving the print thin and weak. A high-flow hotend or larger nozzle raises the ceiling, which is why hardware upgrades sometimes beat slicer tuning for raw speed.
Layer height and infill give you predictable savings with low risk. Acceleration, jerk, and input shaping give you the largest savings of all, but only on hardware that can handle them, and only if you stay under the hotend's flow-rate ceiling.
Using a 3D Print Time Estimator Before You Hit Start
A 3D print time estimator is the slicer's built-in projection of how long a job will run, calculated from the toolpaths it generates, the most reliable number you'll get before the machine starts.
Hardware, Nozzle Diameter, and Actual Throughput
Nozzle diameter sets the upper bound on extrusion rate, and extrusion rate sets real throughput: a wider nozzle moves more material per second and shortens the job.
3D Printing Post-Processing Time: The Part Nobody Counts
3D printing post-processing time is the labor after the machine stops, routinely adding 15 minutes to over an hour per piece. Support removal, sanding, and assembly all count against your real deadline.
Where post-processing time goes:
- Support removal. Ten minutes to half an hour depending on how much was needed.
- Sanding and cleanup. Five to twenty minutes for visible layer lines.
- Assembly and gluing. Separately printed parts, like eyes on an articulated figure, need careful placement.
- Finishing touches. Painting, sealing, or mounting hardware add time on top.
Conclusion
The honest answer to how long do 3d prints take: machine time is only part of the story. Slicer settings, hardware limits, and post-processing all push the real number past the estimate on screen.
Frequently Asked Questions
Why do my 3D prints take so long?
Print time comes down to how much material the printer has to lay down and how fast it can move. Layer height, infill density, wall thickness, and print speed all stack up. A model with fine layers and dense infill can take three to four times longer than the same model printed with thicker layers and lighter infill. Support structures and slow first layers add more time on top of that.
How does layer height affect 3D printing time?
Layer height sets how thick each pass of the nozzle is. A 0.1 mm layer height needs roughly twice as many layers as a 0.2 mm layer height for the same model, so print time nearly doubles. Dropping from 0.2 mm to 0.3 mm cuts the layer count by about a third. Thicker layers print faster but show more visible stepping on curves and angled surfaces.
Is there a way to estimate 3D print time before starting?
Yes. Slicer software generates a time estimate as soon as you load a model and apply your settings. The estimate accounts for layer count, travel moves, acceleration, and extrusion rate. Treat it as a close guide rather than an exact number, since real print time can run 10 to 15 percent longer once the printer handles first layer speed, cooling fan speed, and retraction settings on the actual machine.
How long should I wait before removing a print from the build plate?
Wait until the bed cools to room temperature, usually 10 to 20 minutes after the print finishes. PLA releases more easily once it cools, and pulling a warm print can warp the base or damage print bed adhesion on the next job. If the model is still stuck after cooling, flex the plate or use a thin scraper rather than forcing it.
0 comments