
Table of Contents
- CAD vs. Mesh-Based Modeling: Which Approach Fits Your Custom 3D Items?
- Best 3D Modeling Software for Beginners
- Step-by-Step Workflow: From Concept to Printable Custom 3D Items
- 3D Printing Design Best Practices
- How to Prepare 3D Models for Printing
- Version Control, File Management, and Post-Processing Design
- Common Mistakes Beginners Make (and How to Avoid Them)
- When to Design It Yourself vs. Order a Custom Print
Last Updated: August 19, 2026
Designing custom 3D items has never been more accessible, but most beginners open a software program, stare at a blank workspace, and have no idea where to start. This guide from Bandit's Print Den walks you through the entire process, from choosing the right software to exporting a print-ready file, with honest advice about where beginners typically go wrong.
CAD vs. Mesh-Based Modeling: Which Approach Fits Your Custom 3D Items?
The first decision is choosing your modeling approach. Two fundamentally different workflows exist, and picking the wrong one adds hours of frustration.
CAD (Computer-Aided Design) is dimension-driven. You define exact measurements, angles, and constraints. This approach is ideal for functional parts, enclosures, brackets, and anything that needs precise tolerances.
Mesh-based modeling works by pushing, pulling, and sculpting polygons like digital clay. You're shaping form by eye rather than entering measurements. This approach suits organic shapes, character figures, and decorative objects where exact dimensions matter less than overall appearance.
The mistake most beginners make is defaulting to whichever software they heard about first, without asking which workflow matches their goal.
Parametric Design: Precision for Functional Parts
Parametric design is a subset of CAD where every dimension is defined by a parameter you can change at any time. Adjust one value and the entire model updates automatically. For custom 3D items like phone stands, name plates, or snap-fit enclosures, this is the right approach. If your first print is 2mm too wide, you change one number and re-export, no remodeling from scratch.
According to Autodesk's design and manufacturing resources, parametric modeling is the industry standard for mechanical design because it preserves design intent throughout iterative changes.
Sculptural Workflows: Organic Shapes and Artistic Figures
Sculptural modeling starts with a base mesh and uses sculpt brushes, smoothing, and subdivision to add detail. Polygon count matters: low-poly meshes print faster with fewer support issues; high-poly meshes capture fine detail but require careful preparation. For articulated figures, character busts, or decorative pieces, sculptural workflows produce results that parametric tools cannot match. The tradeoff is that geometry validation becomes critical, sculptural meshes are far more likely to contain non-manifold edges and internal geometry that cause slicing errors.
Best 3D Modeling Software for Beginners
The best software matches both your project type and your willingness to climb a learning curve. For parametric/CAD work, Fusion 360 and FreeCAD are the most commonly recommended starting points. Fusion 360 has a gentler interface; FreeCAD is entirely open-source. For sculptural work, Blender is the dominant free option and is genuinely capable of professional-quality output. TinkerCAD sits at the very beginner end and is excellent for simple shapes and quick customizations.
Free vs. Paid Options: Accessibility Compared
| Software | Type | Cost | Best For |
|---|---|---|---|
| TinkerCAD | CAD/Parametric | Free | Absolute beginners, simple shapes |
| FreeCAD | CAD/Parametric | Free | Functional parts, open-source users |
| Fusion 360 | CAD/Parametric | Free for personal use | Intermediate users, mechanical parts |
| Blender | Mesh/Sculptural | Free | Organic shapes, artistic figures |
| ZBrush | Sculptural | Paid subscription | Professional character sculpting |
The free tier of Fusion 360 covers the vast majority of what hobbyists and small creators need. Blender has a steeper learning curve than its competitors, but the Blender Foundation's official tutorials are genuinely good and freely available.
Step-by-Step Workflow: From Concept to Printable Custom 3D Items
A clean workflow follows six stages. Skipping any of them tends to produce either a failed print or a model that needs significant rework.
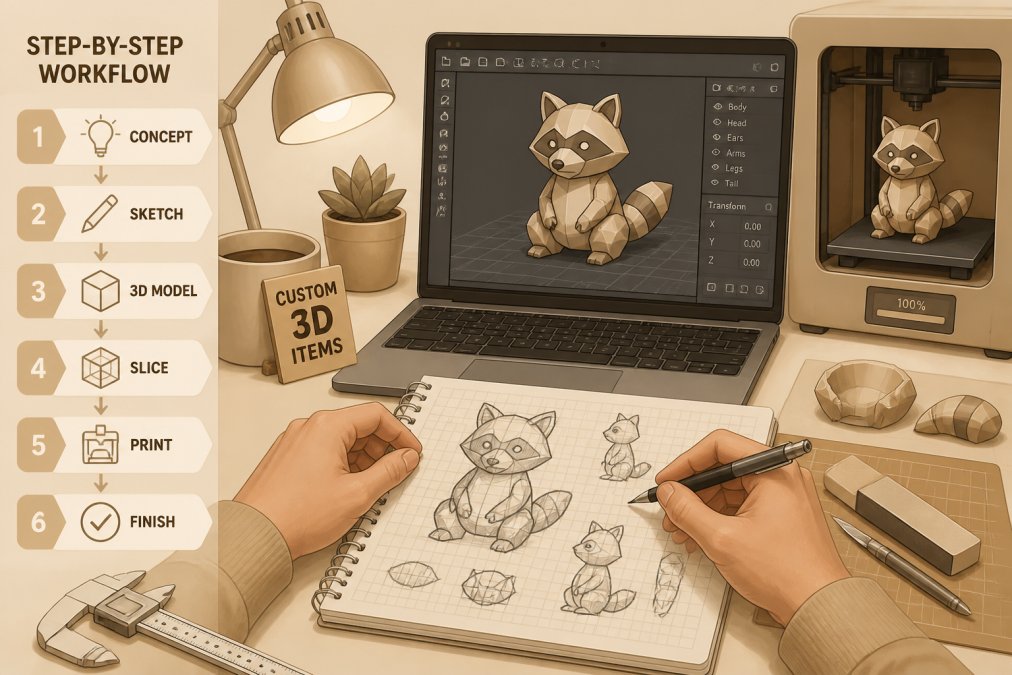
Step 1: Sketch your concept. Even a rough pencil sketch clarifies dimensions, proportions, and which features are essential.
Step 2: Choose your software and modeling approach. Open the appropriate tool and set your units to millimeters before you start.
Step 3: Build the base geometry. Start with primitive shapes and use extrude and revolve operations to develop the main form. Avoid adding fine detail until the overall shape is correct.
Step 4: Add personalization. Custom text, logos, or surface features go in at this stage.
Step 5: Validate the mesh. Run a geometry check before exporting. Fix any non-manifold edges or holes.
Step 6: Export to STL or OBJ. Choose the correct format for your slicer and set appropriate export resolution.
Adding Personalization and Custom Text
Most CAD tools include a text tool that extrudes letters directly onto a surface. Key considerations:
- Minimum recommended letter height for legible printing is around 5mm
- Embossed text (raised) is more reliable than debossed (recessed) at small scales
- Choose bold, sans-serif typefaces for small text; thin strokes may not survive printing
- For logos, import an SVG file and extrude it as a solid body rather than recreating it manually
Boolean Operations, Extrude, and Revolve Explained Simply
Extrude takes a 2D sketch and pulls it into a 3D solid. Draw a rectangle, extrude it 10mm, and you have a box.
Revolve takes a 2D profile and rotates it around an axis. This is how you model vases, wheels, and rounded knobs efficiently.
Boolean operations combine or subtract solids. A boolean union merges two bodies. A boolean difference cuts one shape out of another. A boolean intersection keeps only the overlapping volume. These operations, combined with extrude and revolve, can produce surprisingly complex geometry.
3D Printing Design Best Practices
Designing for 3D printing is different from designing for CNC machining or injection molding. The process builds objects layer by layer, which creates specific constraints your design must respect.
Wall Thickness, Tolerances, and Infill Density
Wall thickness is the most commonly ignored constraint among beginners. A general rule of thumb for FDM (fused deposition modeling) printing is a minimum wall thickness of 1.2mm. For parts that need to bear any load, 2mm or more is safer.
Tolerances matter whenever two parts need to fit together. A clearance of 0.2mm to 0.4mm between mating parts is a common starting point, though the exact value depends on the printer and material.
Infill density controls how solid the interior of a print is. For decorative objects, 15-20% infill is typically sufficient. For functional parts under stress, 40% or higher is more appropriate.
Print Orientation and Support Structures
Print orientation determines which direction the layers stack and has a significant effect on both strength and surface quality. Parts are weakest along the layer lines, so orient load-bearing features perpendicular to the layer direction where possible.
Support structures are automatically generated by slicer software to hold up overhanging geometry. The problem is that supports leave marks where they contact the model. Designing with print orientation in mind can eliminate the need for supports entirely. A 45-degree chamfer instead of a horizontal overhang, for example, often prints cleanly without any support.
How to Prepare 3D Models for Printing
Preparing a 3D model for printing means confirming that the geometry is clean, the file format is correct, and the slicer settings match the intended outcome.
Checking for Manifold Geometry and Watertight Meshes
Manifold geometry means every edge in your mesh is shared by exactly two faces. No holes, no internal floating surfaces, no edges shared by more than two faces. A non-manifold mesh confuses slicer software.
A watertight mesh is one that, if filled with water, would hold it. No gaps, no holes. This is the practical test for whether a mesh is ready to print.
Free tools like Meshmixer and the Netfabb online repair service can automatically detect and repair many common mesh errors. Running your model through one of these before exporting is a good habit.
Exporting STL and OBJ Files Correctly
STL (Standard Tessellation Language) is the most widely supported format for 3D printing. It stores geometry as a mesh of triangles. When exporting to STL, you'll typically be asked to set a resolution or deviation tolerance. A finer resolution means more triangles and a larger file, but smoother curves in the final print.
OBJ format supports color and texture information, which STL does not. If your model has multiple materials or surface colors that your printer can handle, OBJ is the better choice. For single-material FDM prints, STL is the standard.
Export at a resolution where curves appear smooth but the file size stays manageable. A common guideline is a chord deviation of 0.01mm to 0.05mm for most objects.
Version Control, File Management, and Post-Processing Design
3D design projects accumulate files fast: base models, modified versions, export files, slicer project files. A simple naming convention like projectname_v01.stl, projectname_v02.stl takes seconds to implement and saves real time when you need to go back to an earlier iteration.
Keep source files (the native format from your modeling software) separate from export files (STL, OBJ). Source files are editable; export files are not. Losing your source file means starting over from scratch.
Post-processing design considerations are also worth thinking about before you print. If you plan to sand, paint, or prime the finished object, design slightly looser tolerances to account for the material you'll be adding. Smooth surfaces are easier to paint than textured ones, but textured surfaces hide layer lines naturally.
As documented in the National Institute of Standards and Technology's additive manufacturing resources, design for additive manufacturing considers the full production lifecycle, including post-processing, from the earliest design stages.
Common Mistakes Beginners Make (and How to Avoid Them)
Designing without checking printability. A beautiful model that violates wall thickness rules or has unsupported overhangs everywhere is not a design: it's a problem deferred. Check your model against printing constraints at every stage.
Ignoring units. Designing in inches in software set to millimeters produces a model that is 25.4 times the wrong size. Set your units before you place a single sketch.
Exporting at the wrong resolution. Too low and curves become visible facets in the final print. Too high and the file size balloons. Find the middle ground.
Not iterating. The first version of a custom design almost never prints perfectly. Plan for at least two or three print iterations when developing something new.
Skipping mesh validation. Non-manifold geometry is invisible to the eye but catastrophic to a slicer. Validate before you export, every time.
Overcomplicating the first project. A highly detailed articulated figure is not a beginner project. Start with something simple: a custom coaster, a name plate, a basic enclosure.
When to Design It Yourself vs. Order a Custom Print
Designing your own custom 3D items makes sense when you have a specific, unusual requirement that no off-the-shelf product meets, when you enjoy the design process itself, or when you need to iterate quickly on a functional prototype.
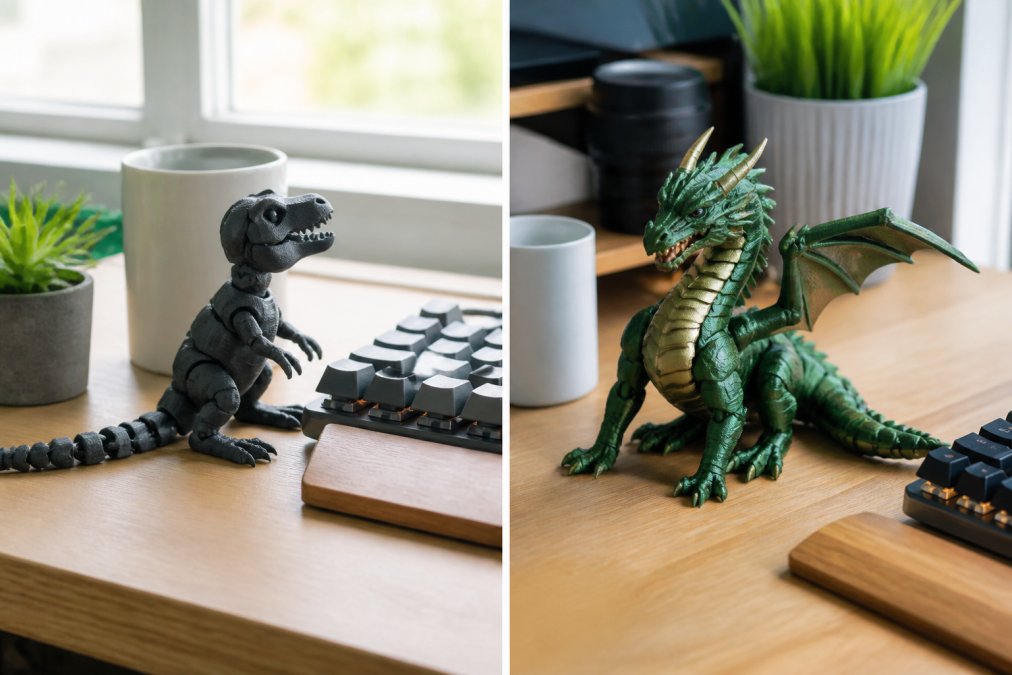
It does not make sense when the design complexity exceeds your current skill level and the timeline is tight, when you need professional-quality detail that requires advanced sculpting experience, or when the time investment in learning the tools outweighs the cost of ordering.
This is where a service like Bandit's Print Den fills a genuine gap. Rather than spending weeks learning parametric modeling to produce one articulated figure, you can describe what you want and receive a high-quality, detailed print shipped directly to you. Customer feedback on Bandit's Print Den orders consistently highlights the level of detail and the speed of delivery as standout qualities.
| Scenario | Design It Yourself | Order a Custom Print |
|---|---|---|
| Simple, functional part | Ideal | Unnecessary |
| Complex articulated figure | High skill required | Recommended |
| Tight deadline | Risky | Reliable |
| Unique gift with specific vision | Possible with time | Easier and faster |
| Ongoing prototyping work | Worth learning | Less efficient |
Most people fall somewhere in the middle. Learning the basics of 3D modeling is genuinely useful even if you plan to order most of your custom items. Understanding the design process makes you a better customer: you can communicate your vision more clearly, set realistic expectations, and evaluate the quality of what you receive.
For a deeper look at where additive manufacturing is headed and how design tools are evolving, MIT's additive manufacturing resources offer a solid technical foundation for anyone who wants to go beyond the basics.
Frequently Asked Questions
What software is best for beginners to design 3D models?
Tinkercad is the most beginner-friendly option for custom 3D items, it runs in a browser, requires no installation, and teaches basic CAD concepts through simple drag-and-drop tools. Blender is a strong free alternative for sculpting organic shapes like figures or characters, though its learning curve is steeper. If you want parametric precision for functional parts, FreeCAD or Fusion 360's free tier are solid starting points. The best choice depends on whether your design is geometric or organic.
What is the difference between CAD and sculpting software for 3D printing?
CAD software builds models from precise measurements, sketches, and mathematical constraints, ideal for parts with exact dimensions, threads, or mechanical fits. Sculpting software, like Blender or ZBrush, lets you push and pull a digital mesh the way you would clay, making it better for characters, figures, and artistic pieces. For custom 3D items that need to snap together or hold specific tolerances, CAD wins. For expressive, organic designs, sculpting gives you more creative freedom.
How do I prepare a 3D design file for printing?
Start by running a geometry check to confirm your mesh is watertight, meaning it has no holes, open edges, or non-manifold geometry. Tools like Meshmixer or the repair function inside your slicer can catch most issues automatically. Set wall thickness to at least 1.2 mm for structural integrity. Export as an STL or OBJ file, then open it in slicer software to set layer height, infill density, support structures, and print orientation. Review the sliced preview before sending to a printer or a professional print service.
Can AI tools help in creating 3D printable files?
AI tools can assist at several stages but currently have real limitations. Text-to-3D generators can produce rough mesh concepts quickly, but the output almost always contains non-manifold geometry that requires manual cleanup before printing. ChatGPT and similar language models cannot reliably export valid STL files directly. AI is most useful for generating reference images, writing parametric scripts, or suggesting design proportions. For print-ready files, a human modeling step is still necessary to ensure geometry validation and correct tolerances.
Can you legally sell 3D printed items?
Selling original designs you created is generally legal. The legal risk comes from printing and selling items based on copyrighted or trademarked characters, logos, or patented mechanisms without a license. In the United States, copyright law protects original creative works, and trademark law protects brand identifiers. If you are selling custom 3D items based on your own artwork or fully original designs, you are on solid ground. Always verify that any third-party design files you use carry a commercial-use license before selling finished prints.
How do I actually place a custom 3D print order if I don't have design files?
You don't need to supply files to order a custom piece. Many professional print studios, including Bandit's Print Den, will work from a description, reference images, or rough sketches. You describe what you want, dimensions, style, any personalized text or details, and the studio handles the 3D modeling and print-prep. This is the easiest path for anyone who wants a one-of-a-kind item without learning CAD software. Check the shop's product listings or contact them directly to discuss your specific project.
Designing custom 3D items from scratch takes time to learn well, and the technical requirements of print-ready geometry add a layer of complexity that most creative tutorials gloss over. If you want the result without the learning curve, Bandit's Print Den offers customized 3D-printing projects with genuine attention to detail, fast shipping, and free shipping on orders over $35. Describe your vision, and the team will handle the rest. Add to cart and see what a truly custom print looks like.
This article was written using GrandRanker
0 comments