
Table of Contents
- Why Sealing 3D Printed Figures Matters
- Preparing Your Print: Cleaning and Surface Smoothing
- Best Sealer for PLA 3D Prints
- How to Seal Painted 3D Prints
- Sealing 3D Prints with Epoxy Resin
- Application Technique: Applying Sealer Evenly
- How Long Should 3D-Print Sealer Dry Between Coats
- Common Sealing Mistakes to Avoid
- Frequently Asked Questions
Last Updated: October 14, 2026
Why Sealing 3D Printed Figures Matters
When you first pull a 3D printed figure off the print bed, it's fragile, which is why learning how to seal 3d printed art figures is essential.

Sealing changes everything. A good seal protects your print from damage, dust, and wear.
The seal acts like armor for your figure, especially if it sits on a desk or shelf where it gets handled or bumped.
The real benefit goes deeper than just protection. Sealing lets you control the final finish. Want a glossy display piece that catches light? Use a gloss clear coat.
Without sealing, even a beautifully painted 3D printed figure will show wear quickly. Paint chips. Dust settles into layer lines. The print looks tired after a few months.
Preparing Your Print: Cleaning and Surface Smoothing
The most common mistake people make is jumping straight to sealing without prep work. That's backwards. Preparation determines everything about your final result.
Start by examining your print in good light. Look for visible layer lines, rough spots, and any loose plastic bits from supports or printing artifacts. These imperfections will show through your seal and become permanent.
Removing layer lines and imperfections
Layer lines are the horizontal striations that appear on every 3D print. They're normal, they're how the printer builds the object layer by layer. But they make your figure look unfinished.
You have two main options:
- Sanding: Use fine-grit sandpaper (400-600 grit) to smooth the surface gently. Work in circular motions, light pressure only. Start with 400 grit, then finish with 600 for a smoother result. This takes time but gives excellent results.
- Chemical smoothing: Certain solvents can slightly melt the PLA surface, filling in layer lines. Acetone works on ABS, but PLA is trickier. This method requires careful handling and good ventilation.
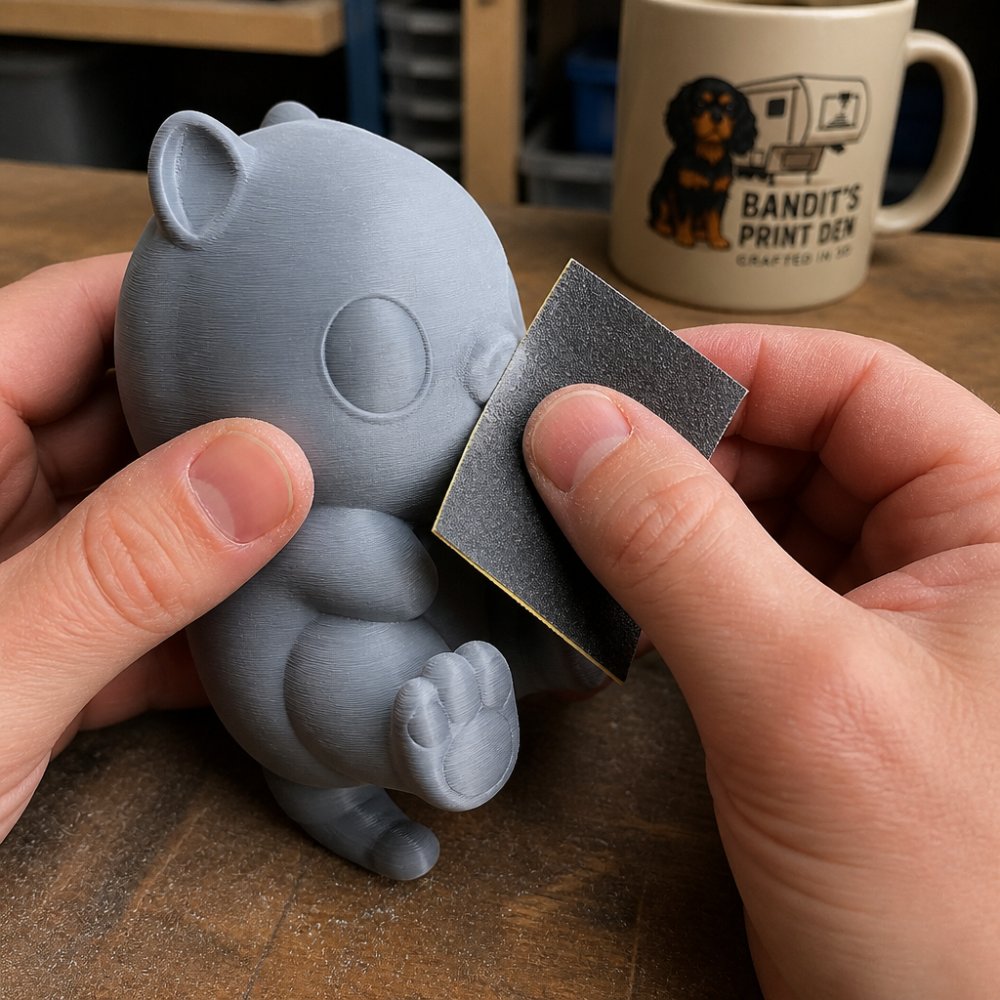
For most people, sanding is safer and more controllable. It takes 10-20 minutes per figure, depending on size.
Cleaning before sealing
After sanding, your print will have dust and loose particles all over it. If you seal over that, the dust gets trapped under the coating and looks terrible.
Rinse your print under warm water with a soft brush or cloth. Get into crevices and joints. Dry it completely with a lint-free cloth. If your figure has paint on it, use gentle pressure, you don't want to damage the paint job.
Let it air dry for at least 30 minutes before sealing. Any moisture trapped under the seal will cause cloudiness or peeling.
Best Sealer for PLA 3D Prints
The sealer you choose depends on your final look and the print's purpose. Different sealers give different results, and not all work equally well on PLA.
Spray sealers and clear coats
Spray sealers are the easiest option for most people. They dry fast, apply evenly, and create a protective layer without adding much thickness.
Acrylic spray sealers are water-based and beginner-friendly. They dry in minutes and don't have a strong smell. They work fine on unpainted prints and painted prints.
Polyurethane spray sealers are tougher. They create a harder, more scratch-resistant finish. They take longer to cure (24 hours for full hardness) but the protection lasts longer.
Lacquer sealers are the most durable spray option. They create a glass-like, hard finish that resists scratches and impacts well.
For most decorative figures, a good acrylic or polyurethane spray sealer works great.
Matte versus glossy finishes
This is purely aesthetic, but it matters for how your figure looks on display.
Glossy finishes reflect light and make colors appear brighter and more saturated. Details stand out. Glossy works well for colorful figures and characters where you want maximum visual impact. The downside: glossy shows fingerprints and dust more obviously.
Matte finishes absorb light and give a more subtle, refined appearance. They hide dust and fingerprints better. Matte is popular for professional display pieces and sculptures. Colors appear slightly muted compared to glossy, but the overall look feels more sophisticated.
Many people apply a glossy sealer first, then a matte topcoat to dial in the exact finish they want. This gives you flexibility.
How to Seal Painted 3D Prints
Painted prints need extra care during sealing. You want to protect the paint without smudging or damaging the artwork.
Protecting paint without smudging details
If your figure has paint on it, let the paint cure fully before sealing. Most acrylics need 24 hours. Oil-based paints need longer, check the label.
Use spray sealers rather than brush-on options. Spraying keeps you from touching the paint and disturbing it.
Pay special attention to detailed areas. Spray from different angles to make sure the sealer reaches into crevices and under overhangs.
Avoid spraying directly into recessed areas where liquid could pool. The sealer should coat, not flood.
For prints with delicate details, fine hair, thin appendages, intricate facial features, consider using a matte spray. Matte coats are thinner and less likely to obscure fine details than glossy coats.
Sealing 3D Prints with Epoxy Resin
Epoxy resin is a different approach entirely. Instead of a surface coating, epoxy creates a thick, protective shell that can even waterproof your print.
When to use epoxy for waterproofing
Epoxy resin works best when you need serious waterproofing or a high-gloss, glass-like finish. It's popular for decorative pieces that might sit near water, or for figures you want to look like they're encased in crystal.
Epoxy is overkill for a simple desk figure. But if you're sealing a print that will live in a humid environment, near a sink, or anywhere moisture matters, epoxy is worth considering.
The process takes longer than spray sealing. You mix two-part epoxy, pour or brush it onto the print, and let it cure for 24-48 hours. It's also messier and requires careful handling.
Food-grade epoxy for functional prints
If you're sealing a 3D printed figure that will hold food or liquids (like a decorative dish or container), you need food-grade epoxy. Not all epoxies are food-safe. Check the label specifically for "food-grade" or "food-contact" rating.
XXL Flexi T-Rex Skeleton | 36" 3D Printed Articulated Dinosaur →

Food-grade epoxy creates an airtight, watertight seal that meets safety standards. It's more expensive than standard epoxy, but it's necessary if the print will touch food.
Apply food-grade epoxy in thin coats. Build up thickness gradually rather than pouring one thick layer. This gives better adhesion and fewer air bubbles.
Let food-grade epoxy cure fully, usually 48 hours, before using the print with food.
Application Technique: Applying Sealer Evenly
How you apply the sealer matters as much as which sealer you choose, and mastering how to seal 3d printed art figures requires attention to technique. Poor application causes drips, pooling, uneven coverage, and a cheap-looking finish.
Spraying versus brushing
Spraying is almost always better for 3D prints. Spray coats dry faster, apply more evenly, and don't leave brush marks. You get consistent thickness across the whole print.
Hold the spray can 8-10 inches from the print. Move in smooth, steady motions. Overlap each pass slightly. Spray from multiple angles to reach all surfaces, top, bottom, sides, and details.
Brushing works only for epoxy resin or very thick coatings. For spray sealers, brushing leaves visible strokes and uneven thickness. Don't do it unless you have no other choice.
Avoiding drips and pooling
Drips happen when you apply too much sealer too fast. The solution is simple: multiple thin coats instead of one thick coat.
Spray for 2-3 seconds, then move on. Let that coat dry. Apply a second coat. Three thin coats beat one thick coat every time.
Watch for pooling in recessed areas and under overhangs. If sealer collects in a groove, it will drip or dry unevenly. Tilt the print or spray from a different angle to prevent pooling.
If you do get a drip, let it dry completely, then sand it smooth and apply another thin coat over it.
How Long Should 3D-Print Sealer Dry Between Coats
Drying time varies by sealer type, temperature, and humidity. Rushing this step ruins your finish.
Curing and full hardness
Acrylic spray sealers dry to the touch in 15-30 minutes. You can apply a second coat after 1-2 hours. Full cure (maximum hardness) takes 24 hours.
Polyurethane sealers take longer. They're dry to the touch in 2-4 hours but need 24 hours between coats for proper adhesion. Full cure takes 48-72 hours.
Lacquer sealers dry fast, 15-30 minutes to the touch, but also need 24 hours between coats. Full hardness takes several days.
Epoxy resin is the slowest. Between coats, wait at least 4-6 hours. Full cure takes 24-48 hours depending on the brand.
Always check the product label. Manufacturers specify drying times, and those times assume normal room temperature (around 70°F) and moderate humidity.
Number of coats for durability
For spray sealers, three thin coats is the standard. Two coats works for light protection. Four coats gives maximum durability for prints that get handled often.
For epoxy resin, two coats is usually enough. More than that wastes material and extends cure time.
Each coat should be light and even. You're building protection gradually, not trying to cover everything in one pass.
Wait the full recommended time between coats. If you rush and apply coat two before coat one is fully dry, the coats won't bond properly and the seal will peel or crack.
Common Sealing Mistakes to Avoid
Learning what not to do saves time and ruined prints.
Sealing over dust and debris. This is the number-one mistake. Always clean and dry your print before sealing.
Applying sealer to wet prints. Moisture under the seal causes cloudiness, peeling, and poor adhesion.
Using one thick coat instead of multiple thin coats. Thick coats drip, pool, and dry unevenly.
Not ventilating properly. Many sealers release fumes. Spray in a well-ventilated space or outdoors.
Skipping the prep work. Sanding and smoothing layer lines takes time, but it's worth it.
Handling the print immediately after sealing. Even if it feels dry, the seal is still curing.
| Sealer Type | Drying Time | Full Cure | Best For | Durability |
|---|---|---|---|---|
| Acrylic spray | 15-30 min | 24 hours | Beginners, unpainted prints | Moderate |
| Polyurethane spray | 2-4 hours | 48-72 hours | Painted prints, moderate handling | High |
| Lacquer spray | 15-30 min | Several days | Maximum durability, detailed work | Very high |
| Epoxy resin | 4-6 hours between coats | 24-48 hours | Waterproofing, glass-like finish | Extreme |
Sealing your 3D printed figures protects them and makes them look finished and professional.
If you're ordering a custom 3D printed figure from us, we can discuss sealing options and help you choose the finish that matches your vision. Get started with Bandit's Print Den and bring your custom creations to life with professional-quality sealing techniques that make every detail shine.
Frequently Asked Questions
Do you need to seal PLA 3D prints?
Sealing PLA 3D prints is recommended if you want them to last longer and resist moisture. While PLA is naturally somewhat durable, sealing protects against dust accumulation in layer lines, adds water resistance, and enhances the visual finish. For display figures that won't be handled frequently, sealing extends their lifespan and keeps colors vibrant. For functional or frequently-touched items, it's essential for durability.
What's the best sealer for PLA 3D prints?
Spray sealers designed for plastic or wood work best for PLA figures. Matte spray sealers preserve fine details without adding shine, while glossy clear coats enhance color and create a protective layer. Look for sealers that are UV-resistant to prevent yellowing over time. Epoxy resin is another excellent option for waterproofing and creating a durable, glossy finish, though it requires more application skill. Always test on a scrap print first.
How long should 3D-print sealer dry between coats?
Most spray sealers dry to the touch in 15-30 minutes but require 2-4 hours between coats for proper adhesion. Check your sealer's label for exact timing. For epoxy resin, allow 24 hours of curing before applying a second coat. Rushing between coats can result in cloudy finishes or uneven coverage. Full hardness typically takes 24-48 hours, depending on the product and humidity.
Can you seal a 3D-printed figure with epoxy resin?
Yes, epoxy resin is an excellent sealing option for 3D printed figures, especially for waterproofing and creating a glossy, durable finish. It works well on both painted and unpainted prints and provides superior protection for display pieces. Use food-grade epoxy if the figure will contact food or liquids. Apply thin, even coats to avoid trapping air bubbles. Epoxy requires proper ventilation during application and curing.
0 comments