
Table of Contents
- Why Print-in-Place Fidget Mechanisms Fail
- Best Slicer Settings for Articulated Prints
- Calibrating Your 3D Printer Tolerance Test
- How to Loosen Stiff 3D Printed Joints
- Diagnosing Stringing, Over-Extrusion, and Retraction Issues
- Material Selection: PLA vs PETG for Fidget Mechanisms
- Testing Your Print-in-Place Design Before Final Production
- Frequently Asked Questions
Last Updated: September 29, 2026
Why Print-in-Place Fidget Mechanisms Fail
When your articulated 3D print comes off the bed and the joints won't move, the problem usually isn't your design. It's one of three things: your printer settings, your material choice, or how you finished the part after printing.
Print-in-place fidget mechanisms are tricky. The hinges, gears, and linkages need clearance to move freely. Too tight, and they fuse together. Too loose, and they fall apart.
Most failures happen because people skip calibration. They assume their printer is dialed in and jump straight to printing. That's backwards. A print-in-place design demands precision. Your bed leveling, nozzle temperature, and extrusion width all directly affect whether joints move or lock up.
The good news: these problems are fixable. You don't need a new printer. You need to understand what's actually happening inside your print.
Best Slicer Settings for Articulated Prints
Your slicer settings determine whether your print-in-place fidget mechanisms work or fail. Three settings matter most: layer height, extrusion width, and cooling fan speed.
Layer Height and Extrusion Width
Layer height controls how thick each layer of plastic is. Extrusion width controls how much plastic comes out of the nozzle.
For print-in-place designs, use these settings:
- Layer height: 0.15mm to 0.2mm (not 0.3mm)
- Extrusion width: 0.4mm to 0.45mm (match your nozzle size)
Thinner layers give you better detail. They also give you tighter tolerances on moving parts. A 0.3mm layer height might look smooth, but it's too thick for hinges and joints. You lose the precision you need.
Extrusion width matters because it affects how much plastic fills the gap between moving parts. If your extrusion width is too high, the plastic squeezes into spaces it shouldn't. That's how joints fuse together.
Test both settings before printing your final design. Print a small test part with moving joints. Flex it. If it's stiff but not locked, you're in the right range.
Cooling Fan Speed and Thermal Expansion
Cooling fan speed controls how fast the plastic cools after it leaves the nozzle. This directly affects thermal expansion.
When PLA cools fast, it shrinks less. When it cools slow, it shrinks more. For print-in-place fidget mechanisms, you want consistent cooling so parts don't warp or bind.
Use these fan speeds:
- First layer: 0% (let it stick to the bed)
- Layers 2-5: 20-30% (slow cooling for strength)
- Layers 6+: 60-80% (fast cooling for precision)
Why does this matter? Thermal expansion is the enemy of tight tolerances. If one part of your print cools faster than another, it shrinks at different rates. That creates stress on the joints. The parts might be perfectly designed, but they'll still bind because of uneven cooling.
A heat gun can help after printing. Gently warm the part to relax the stress in the plastic.
Calibrating Your 3D Printer Tolerance Test
Before you print your final fidget mechanism, you need to know your printer's actual tolerance. Not what the manual says. What it actually produces.
A tolerance test print tells you how tight your clearances can be. It's a small part with gaps of different sizes: 0.2mm, 0.3mm, 0.4mm, 0.5mm. You print it, measure which gaps work, and build that into your design.
MatterHackers tolerance testing guide recommends printing a test part before committing to a full design. This saves time and filament.
Bed Leveling and First Layer Adhesion
Your first layer sets everything else up. If it's not right, your tolerance test is worthless.
Bed leveling means the nozzle is the same distance from the bed at every point. Not close. Exact.
Here's how to level your bed:
- Heat the nozzle to 200°C and the bed to 60°C
- Move the nozzle to the center of the bed
- Use a piece of paper under the nozzle
- Adjust the bed height until the paper has slight resistance
- Check all four corners and the center again
- Move the nozzle in a grid pattern and verify consistent height
This takes 10 minutes. It's the most important step.
First layer adhesion matters because a part that shifts during printing won't have consistent dimensions. The tolerance test becomes meaningless. Use isopropyl alcohol to clean the bed before each print. A clean bed grips better.
Z-Offset and Nozzle Temperature Tuning
Z-offset is the distance between the nozzle and the bed when the printer thinks it's at zero. If your z-offset is wrong, your first layer either squashes or gaps.
Nozzle temperature affects how the plastic flows. Too hot, and it oozes everywhere. Too cold, and it doesn't stick properly.
Mini Fidgets | Collect Them All! →
For PLA, start at 200°C. Print a single layer line. If it's thin and wispy, increase temperature by 5°C. If it's thick and blobby, decrease by 5°C. Find the sweet spot where the line is smooth and consistent.
Temperature also affects your print-in-place fidget mechanisms directly. Hotter plastic flows more, which can fill gaps you designed to be empty. Cooler plastic is stiffer but might not bond between layers properly. Test a few temperatures on your tolerance test print.
How to Loosen Stiff 3D Printed Joints
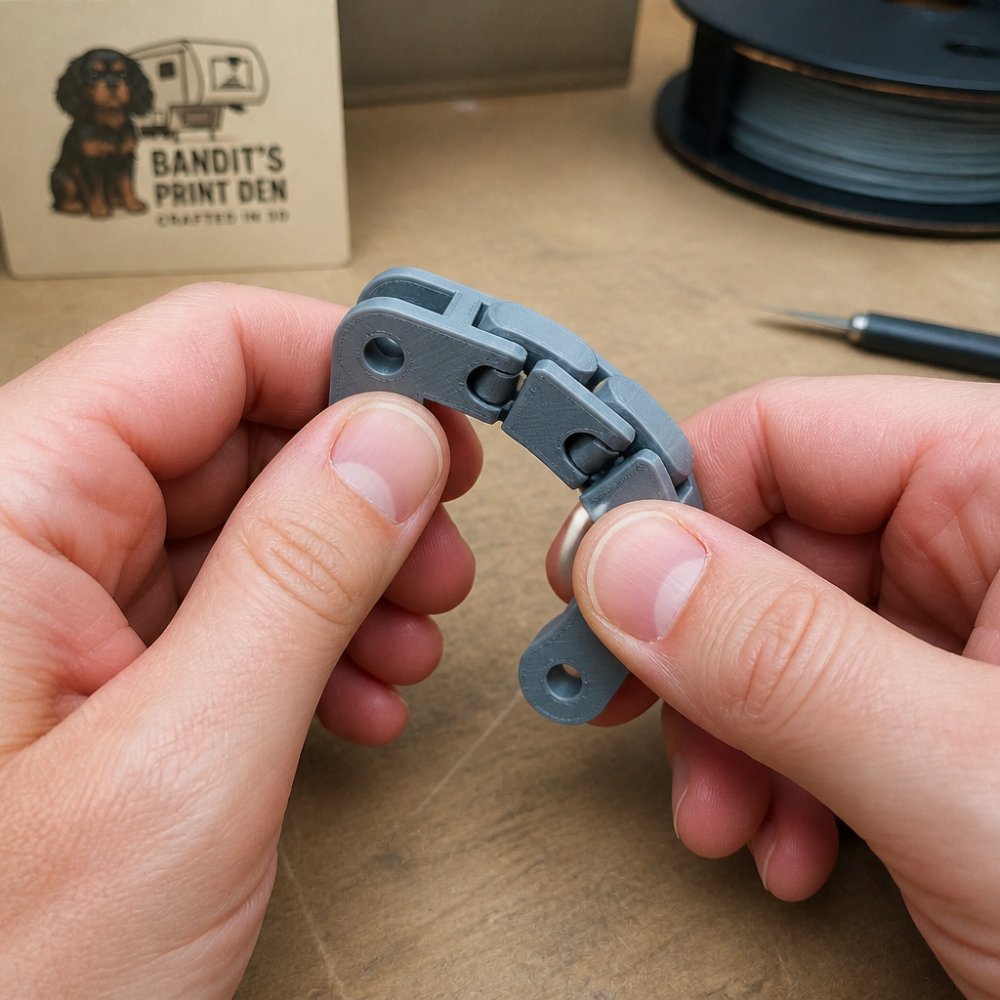
Your print came off the bed and the joints are locked tight. This is the most common problem, and it's almost always fixable.
Mechanical Break-In Procedures
Mechanical break-in means working the joint back and forth until it loosens. This works because you're gradually separating the fused plastic layers.
Here's the process:
- Identify the stiff joint
- Apply gentle pressure in both directions
- Work it slowly for 30 seconds
- Rest for 10 seconds
- Repeat 5-10 times
- Increase pressure gradually if it stays stiff
Don't force it. A joint that's truly fused will snap if you pull too hard. Gentle, repeated movement is better than one hard pull.
For complex print-in-place fidget mechanisms with multiple joints, work them in sequence. Loosen the first joint, then move to the next. The whole process takes 5-10 minutes per part.
Some joints respond better to heat. A heat gun on low setting, held 6 inches away, can soften the plastic enough to flex it. Work the joint while it's warm.
Post-Processing Techniques for Fused Parts
If mechanical break-in doesn't work, post-processing can save the part.
The most effective technique is controlled heating and flexing:
- Heat the joint area with a heat gun (low setting, 30 seconds)
- Flex the joint gently while warm
- Hold the position and let it cool
- Repeat if necessary
Another approach is careful material removal. If two parts are fused together, you can use a small file or sandpaper to remove plastic from the joint area. This creates clearance. Work slowly and test fit frequently. Removing too much weakens the joint.
For intricate print-in-place fidget mechanisms, a dental pick or small tool can separate parts that are barely touching. Apply a tiny bit of pressure to break the bond without damaging the part.
Prusa Research post-processing guide covers advanced techniques for articulated prints. Their approach emphasizes patience over force.
Diagnosing Stringing, Over-Extrusion, and Retraction Issues
Stringing is thin plastic connecting parts that should be separate. Over-extrusion means too much plastic came out of the nozzle. Both problems affect print-in-place fidget mechanisms.
Stringing happens when the nozzle moves between parts without retracting. The plastic oozes out and creates a string.
To fix stringing:
- Increase retraction distance (try 5-7mm for Bowden, 1-2mm for direct drive)
- Increase retraction speed (try 40-50 mm/s)
- Increase nozzle temperature by 5°C (helps plastic flow cleanly)
- Decrease print speed (give the nozzle time to retract properly)
Material Selection: PLA vs PETG for Fidget Mechanisms
PLA and PETG are the two most common materials for print-in-place fidget mechanisms. They have different properties.
Your slicer settings change slightly between materials:
- PLA: 0.15-0.2mm layer height, 60-80% fan speed from layer 6 onward
- PETG: 0.2mm layer height, 30-50% fan speed (needs slower cooling)
Testing Your Print-in-Place Design Before Final Production
Before you print 10 copies of your fidget mechanism for a custom order, test one.
Document what you find:
- Which joints moved freely
- Which joints were stiff
- Where stringing appeared
- How the part feels in hand
For print-in-place fidget mechanisms, a successful test print means:
- All joints move with light pressure
- No stringing visible
- Clean layer lines
- Consistent dimensions
| Setting | PLA | PETG | Impact |
|---|---|---|---|
| Nozzle Temperature | 200°C | 230°C | Affects plastic flow and layer bonding |
| Bed Temperature | 60°C | 80°C | Prevents warping and improves adhesion |
| Layer Height | 0.15-0.2mm | 0.2mm | Thinner = better tolerance on joints |
| Fan Speed (Layer 6+) | 60-80% | 30-50% | Controls cooling and thermal stress |
| Retraction Distance | 5-7mm (Bowden) | 5-7mm (Bowden) | Prevents stringing between parts |
Frequently Asked Questions
Why are my print-in-place fidget mechanisms fused together?
Fused joints happen when the nozzle deposits too much plastic in the clearance gap between moving parts, or when thermal expansion causes parts to bond during cooling. This occurs from over-extrusion, insufficient z-offset, or a nozzle temperature that's too high. Check your extrusion multiplier first, many printers default to 1.0 when 0.95-0.98 works better for tight tolerances. Reduce nozzle temperature by 5-10°C and re-test with a tolerance test print before running the full mechanism.
What is the best layer height for articulated 3D prints?
For articulated mechanisms, layer height directly affects how well the slicer can preserve the tight clearances between moving parts. Thinner layers generally give better detail and tighter tolerances on moving parts.
How do I prevent 3D printed joints from sticking after printing?
Prevent sticking by running a mechanical break-in: flex the joint 20-30 times immediately after the print cools. This helps the parts settle into their correct positions without forcing them apart. If joints are already fused, gently work the joint.
What slicer settings should I use to fix stringing and over-extrusion in print-in-place designs?
Enable retraction (5 mm at 40 mm/s for FDM printers) to reduce stringing between joint parts. Lower your extrusion multiplier to 0.95-0.97 to eliminate over-extrusion that fills gaps. Increase cooling fan speed to help the plastic cool quickly and hold tight tolerances. If you still see stringing, increase retraction distance by 1 mm and test again on a tolerance test print before committing to the full mechanism.
0 comments