
Table of Contents
- 1. Customize Your Design Before Printing with CAD Modeling
- 2. Master Post-Processing and Smoothing Techniques
- 3. Choose the Best Paints for PLA 3D Prints
- 4. Add Interactive Elements: LEDs and Articulated Joints
- 5. Create Personalized Fidget Toys for Stress Relief
- Choosing the Right Materials and Slicing Settings
- Conclusion
- Frequently Asked Questions
Last Updated: September 20, 2026
1. Customize Your Design Before Printing with CAD Modeling
To personalize 3D printed figures, start with design choices before printing. Understanding your options, whether working from scratch or modifying existing models, determines the difference between generic and truly custom results.
Digital Sculpting vs. 3D Scanning
Digital sculpting creates figures from scratch using CAD software, giving complete creative control. This works best for entirely custom designs, new characters, or figures with specific features and proportions you envision.
3D scanning captures real objects from multiple angles and converts them into digital models. It excels for accuracy, scanning collectibles, toys, or likenesses produces faithful copies, but scanned models often need cleanup before printing.
Many creators combine both: scan an object for the base, then sculpt custom details on top for speed plus personalization.
Adjusting STL Files for Your Vision
An STL file is the standard 3D printing format, describing surfaces as a mesh of triangles. Before printing, you'll likely modify it to match your vision.
Common adjustments include:
- Scaling, Make the figure larger or smaller without losing detail
- Rotating and positioning, Arrange the model so it prints efficiently and looks right when finished
- Adding mounting points, Create flat areas where you can attach bases, stands, or custom accessories
- Hollowing, Remove interior material to save filament and reduce print time
- Reinforcing thin sections, Thicken fragile areas like fingers or antennae so they survive printing
At Bandit's Print Den, we help clients adjust files to match their exact vision before printing.
2. Master Post-Processing and Smoothing Techniques
Freshly printed figures look rough with visible layer lines and grainy surfaces. Post-processing transforms raw prints into polished, professional results.
Removing Support Structures
Support structures hold overhanging parts but leave marks. Let prints cool completely, then gently snap supports away with pliers or a craft knife. Sand nubs smooth with fine-grit sandpaper (220-grit or higher). For deep divots, use plastic filler or epoxy putty, cure, then sand flush.
Sanding for a Professional Surface Finish
Sanding removes layer lines and creates smooth surfaces that accept paint well. Start with coarse grit (120-150) for imperfections, progress to medium (180-220), then fine (320-400+) for a silky finish. Water sanding works especially well for PLA, it reduces dust and shows progress clearly. Sand until the surface feels smooth and reflects light evenly.
3. Choose the Best Paints for PLA 3D Prints
Not all paints work on PLA plastic. The right paint sticks, flexes with the plastic, and looks professional; wrong choices chip, peel, or feel cheap.
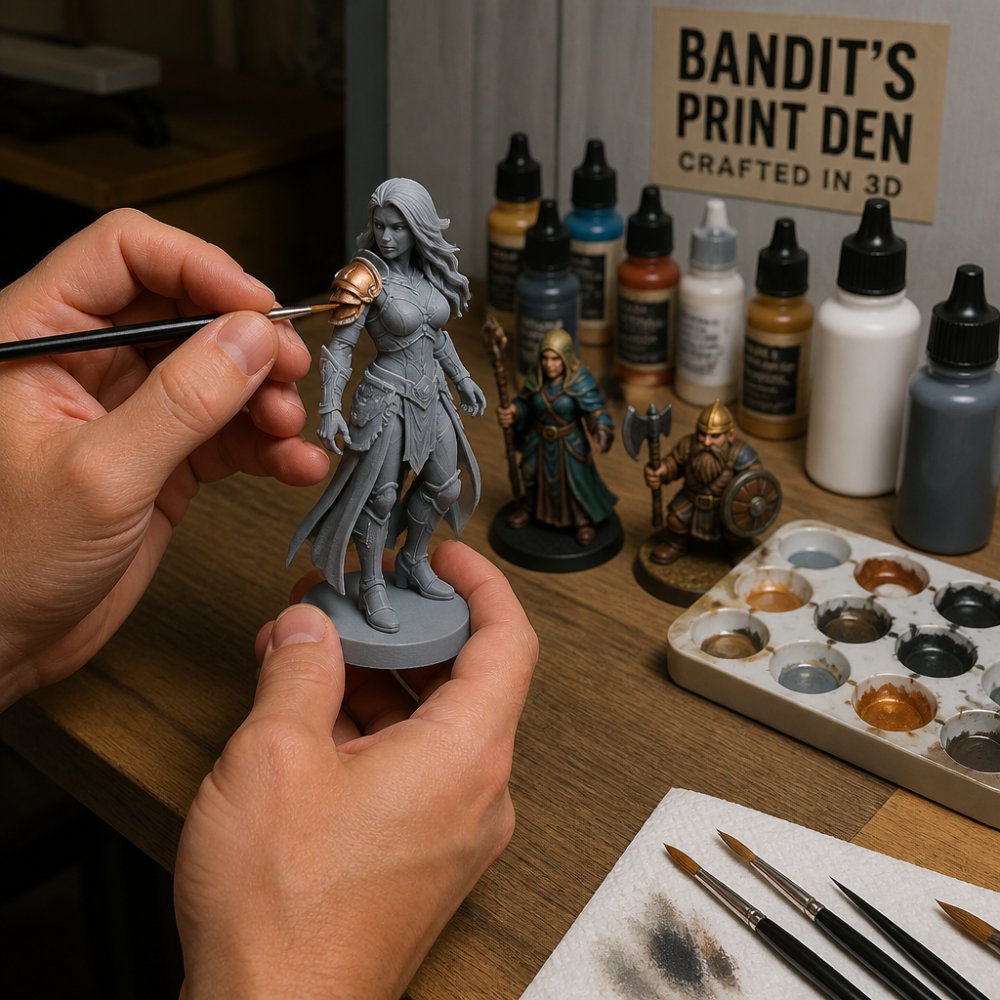
Primer Application and Paint Selection
Primer is non-negotiable, it helps paint adhere to plastic. Use a plastic-bonding primer designed for PLA. Spray primers work fastest; brush-on primers offer more control. Apply two thin, even coats rather than one thick coat.
Acrylic paint is standard for figures, it dries quickly, offers thousands of colors, and cleans with water. Craft acrylics work for larger figures; hobby acrylics offer better pigmentation for detailed miniatures. Enamels are tougher and resist chipping better but dry slowly and require solvent cleanup.
Spray Paint vs. Brush Application
Spray paint covers large areas quickly with smooth, even finishes, ideal for base coats but messy for detail work. Brush painting offers precision for details and fixes but takes longer; use synthetic bristles and thin paint with water. Many projects combine both: spray base coats, then brush details.
4. Add Interactive Elements: LEDs and Articulated Joints
Interactive figures are more memorable than static ones. LEDs and movable joints transform display pieces into engaging, touchable objects.
Integrating LED Components
LEDs create instant visual impact, glowing swords, lit eyes, or illuminated bases. Use small LEDs (3-5mm) with coin-cell batteries (CR2032) and a simple switch. Plan placement before printing: design cavities for LEDs and route wires through hollow sections. For eyes, use translucent or white plastic so light glows through. Test circuits before final assembly, then seal with epoxy or hot glue.
Designing Movable Joints and Customization Points
Articulated joints let you personalize 3D printed figures by making them poseable and fun. A figure with moving arms, legs, or head engages people in a way static pieces don't.
Design joints as simple pin connections. A thin rod passes through holes in two parts, letting them rotate. The rod can be a wooden dowel, metal rod, or even a printed plastic pin.
For a shoulder joint, print the arm with a hole at the shoulder. Print the body with a corresponding hole. Insert a pin between them. The joint should be tight enough to hold position but loose enough to move smoothly.
Ball-and-socket joints are more complex but allow greater movement. Print a sphere on one part and a socket on the other. These joints work best when both parts are flexible enough to snap together without breaking.
Test joint movement before painting. Adjust tolerances if parts are too tight or too loose. Once you're happy, paint the figure completely. Paint seals small gaps and prevents joints from loosening over time.
AWA Grim - Funny Grim Reaper Desk Buddy →
5. Create Personalized Fidget Toys for Stress Relief
Fidget toys serve a real purpose. They give hands something to do, which helps focus and reduces anxiety. A custom 3D printed fidget toy combines function with personal meaning.
Non-Destructive Personalization Methods
Non-destructive personalization means you add custom elements without changing the core design. This approach is fast and reversible.
Interchangeable components are the easiest method. Design your base fidget with slots or attachment points. Print separate pieces, different colored rings, decorative caps, or textured covers, that snap or screw onto the base. Users can swap pieces to match their mood or outfit.
Magnetic attachments work similarly. Embed small magnets in your fidget and print metal-compatible pieces that stick on. This gives endless customization without permanent changes.
Custom paint jobs personalize without modifying the structure. Paint names, initials, or designs directly on the finished fidget. A hand-painted touch feels more personal than a mass-produced item.
Add-on accessories like chains, beads, or tassels clip or glue onto the fidget. These are removable, so the base fidget stays pristine.
The advantage of non-destructive personalization is speed. You print a base design once, then customize it infinitely. Perfect for gift-givers who want something unique without custom printing each time.
Choosing the Right Materials and Slicing Settings
Your material choice affects how your figure looks and feels. PLA is the most popular choice for figures. It's easy to print, produces fine detail, and takes paint well. It's less flexible than other plastics, so articulated joints need careful design.
PETG is tougher and more flexible than PLA. It handles stress better, making it ideal for figures with moving parts. It's slightly harder to print and doesn't capture fine detail quite as well as PLA.
Resin printing produces the finest detail. Resin figures are smoother and more durable than FDM prints. The trade-off is cost, complexity, and longer post-processing (resin requires careful washing and curing).
Slicing settings determine how your figure prints. Layer height controls detail, thinner layers (0.1mm) show more detail but take longer to print. Infill (how solid the interior is) affects strength and weight. For display figures, 15-20% infill is usually enough. For fidget toys or figures that get handled, use 30-40%.
Print orientation matters. Position your figure so supports are minimal and stress points are strong. Avoid printing thin features vertically if possible.
At Bandit's Print Den, we dial in these settings for each project. The right combination of material, layer height, and infill produces figures that look great and last.
Conclusion
Personalizing 3D printed figures transforms them from interesting objects into meaningful pieces. Whether you're customizing the design before printing, perfecting the finish with post-processing, adding interactive elements, or creating something entirely custom, each step gives you control over the final result.
The process takes patience and attention to detail. But the reward is a figure that's genuinely unique, something you designed, built, and finished yourself. Or something Bandit's Print Den crafted specifically for you.
If you want to skip the technical work and jump straight to owning a custom figure, we handle the CAD modeling, printing, post-processing, and finishing. Our team delivers high-quality, articulated 3D-printed figures with the detail and care you'd expect. Check out pieces like the AWA Grim Reaper desk buddy or the AWA Elephant figurine to see what's possible. Orders over $35 ship free, and we deliver fast.


Frequently Asked Questions
What's the best way to personalize 3D printed figures if I don't have design experience?
You don't need CAD skills to personalize 3D printed figures. Start with post-processing: sand the surface smooth, apply primer, and paint with acrylics. You can also add simple elements like interchangeable signs or custom accessories. For more complex customization, services like Bandit's Print Den can handle digital modifications to your specifications, just describe what you want, and they'll adjust the design before printing.
How do you smooth 3D printed figures to get a professional finish?
Begin by removing support structures carefully with clippers or a utility knife. Sand the surface using progressively finer grit sandpaper, starting at 120-grit and finishing with 400-grit or higher for a smooth feel. Apply primer afterward to fill any remaining layer lines before painting. This process transforms rough prints into polished, display-ready figures.
What are the best paints for PLA 3D prints?
Acrylic paints work best on PLA because they adhere well without damaging the material. Apply a primer first, this improves paint adhesion and hides layer lines. Use spray primer for even coverage, then paint with acrylics using a brush or spray can. For durability, seal your finished work with a clear acrylic topcoat. This combination creates a professional, long-lasting finish on your personalized figures.
Can I add LEDs or electronic components to 3D printed figures?
Yes, you can integrate LEDs and electronic components into 3D printed figures through careful design. Plan LED placement during the CAD modeling phase, creating channels or cavities for wiring. Print the figure in sections if needed, allowing you to insert LEDs and batteries before assembly. Use small adhesive-backed LEDs for simplicity, or solder components for permanent integration. This non-destructive approach lets you add interactive elements without compromising the figure's appearance or structural integrity.
0 comments