
Table of Contents
- Why Design Your Own Fidget Toy Instead of Downloading One
- Best 3D Modeling Software for Fidget Toys
- Planning Your Design: Movement, Size, and Ergonomics
- Tolerances for Articulated 3D Prints
- From CAD File to Slicer: Print Settings That Matter
- 3D Printed Fidget Toys for Stress Relief
- Testing, Iterating, and Finishing Your Fidget Toy
- Frequently Asked Questions
Last Updated: September 14, 2026
Why Design Your Own Fidget Toy Instead of Downloading One
Designing a custom 3D printed fidget toy gives you control over movement, size, and feel that no downloaded file can match. Downloading is faster, sure. But the moment a print finishes and the joint binds or the thing feels too small in your hand, you're stuck tweaking someone else's geometry with no idea why it was built that way. Learning how to design custom 3D printed fidget toys means you can fix those problems at the source.

At Bandit's Print Den, we print articulated figures and desk companions all day, and the difference between a file that works and one that frustrates comes down to design decisions made before the first layer. A few principles worth knowing up front:
- You control tolerances, so joints move the way you want
- You can size the toy to a specific hand or pocket
- You can iterate on a single failing joint instead of starting over
- You own the file, so you can reprint or remix it later
The trade-off is real: expect a few failed prints while you dial in clearances. That learning curve is the whole point.
Best 3D Modeling Software for Fidget Toys
Most guides tell you to "use CAD" and stop there. That's useless when you're staring at a blank sketch plane trying to figure out how a hinge actually gets modeled. The right tool depends on which fidget mechanism you're building, so match the software to the joint, not the other way around.
Match the Tool to the Mechanism
- Spinner with a bearing pocket: parametric CAD. You need a precise circular pocket sized to a standard bearing (a common size is 608, with an 8 mm bore, 22 mm outer diameter, and 7 mm thickness) plus balanced mass around the center. Fusion 360, Onshape, and FreeCAD all handle this with a sketch, a revolve, and a circular pattern.
- Print-in-place hinge or chain: parametric CAD again, because the clearance between the pin and the knuckle is a single dimension you'll want to edit repeatedly. Tinkercad can do a crude version, but you'll fight it once you start tuning gaps below 0.4 mm.
- Sculpted creature or organic grip: mesh sculpting. Blender is free and capable, but it has no concept of a parametric joint, so model the mechanical parts in CAD and the body in Blender, then combine them.
- Snap-fit latch or clip: parametric CAD with a fillet tool you trust. Snap-fit geometry lives or dies on the fillet radius at the base of the flexing arm.
Free Tools, Ranked by Fidget Usefulness
Tinkercad is browser-based and free. It's fine for a first blocky spinner or a simple two-part slider, but it has no parametric history, so every change means redoing the shape. Use it to learn the interface, then leave.
Fusion 360 (personal use tier) is the most common starting point for hobbyist fidget design. It gives you sketches, extrudes, revolves, fillets, and a timeline you can scrub back through. The personal tier limits some export and simulation features, but for a spinner or articulated figure it covers everything you need.
Onshape (free plan) runs in the browser and stores version history in the cloud, which is genuinely useful when you're iterating on joint clearance across ten versions. Free-plan documents are public by default, so don't put anything you want to sell in there without checking the current terms.
FreeCAD is open source and fully offline. It's powerful but the learning curve is steeper, and the workflow is less forgiving than Fusion or Onshape for beginners.
Paid Tools: When They're Worth It
SolidWorks and the full Fusion license add assembly mates, simulation, and better file management. For a single fidget toy, you don't need them. They earn their cost when you're producing a product line with interchangeable parts, or when you want to run a stress simulation on a snap-fit arm before printing it.
A Practical First-Project Workflow
- Sketch the mechanism in 2D first, even on paper. Mark the pivot point, the travel arc, and the gap.
- Model the joint as two separate bodies with a known clearance (start at 0.3 mm per side).
- Use a parametric dimension for that clearance so you can change it in one place.
- Export an STL and print a test coupon before modeling the rest of the toy.
- Only after the joint moves correctly do you add the body, texture, and ergonomic features.
If you finish one small part in one tool, you've learned more than you will from a week of comparing feature lists. The tool matters far less than finishing the loop from sketch to printed joint.
Autodesk Fusion 360 personal use license terms
Planning Your Design: Movement, Size, and Ergonomics
Plan the movement before you model anything. A fidget toy is a mechanism first and an object second, and the mechanism dictates every dimension that follows.
Decide what kind of motion you want: rotation, folding, sliding, or a combination. Then work backward to the geometry that produces it. A spinner needs a central bearing housing and balanced mass. A slider needs a track with consistent clearance. A folding chain needs hinges that rotate without binding.
Ergonomic Design: The Part Most Guides Skip
Ergonomics is where a fidget either becomes a habit or ends up in a drawer. Three variables control it: size, weight, and surface.
Size. Adult palm width typically falls somewhere between 70 mm and 90 mm, and a closed-hand grip spans roughly 100 mm to 120 mm across the knuckles. A pocket fidget should sit inside that closed-hand envelope, think 50 mm to 70 mm in its largest dimension, so it disappears into a fist. A desk fidget can run larger, up to 100 mm, because it's meant to be rolled or spun on a surface rather than palmed. Measure your own hand with a ruler before you commit to a dimension; a 5 mm difference is noticeable after ten minutes of use.
Weight. A fidget that's too light feels cheap and skitters; too heavy and your hand tires. For a palm-sized spinner, most makers land in the 30 g to 60 g range, which usually means 15-25% infill with 2-3 perimeters in PLA. If you want more heft without more print time, add a pause at the top layer and drop in a few coins or a washer as a weighted insert, a common trick that costs nothing and changes the feel entirely.
Surface and texture. Texture should be present but never sharp. Fillets of at least 1 mm on every exposed edge prevent the toy from digging into a palm. For grip, a shallow knurl or a pattern of 1-2 mm bumps gives tactile feedback without abrasion. Deep, aggressive texture feels good for thirty seconds and annoying for thirty minutes.
Weight distribution. For a spinner, mass should be symmetric around the bearing axis, or the spin will wobble. For a handheld slider or articulated figure, mass should sit toward the palm side so the toy doesn't feel top-heavy when you grip it.
Print-in-Place vs. Assembly-Required
Print-in-place means the joints are printed already assembled, with built-in gaps so parts move straight off the bed. Assembly-required means you print pieces separately and connect them with pins, screws, or snap-fit features.
Print-in-place is faster and cleaner. Assembly-required gives you tighter tolerances and lets you mix materials, a rigid PLA frame with a flexible TPU grip, for example, is only possible if you print the parts separately. For a first fidget, go print-in-place. For a display piece where joint feel matters most, assembly is worth the extra steps.
A Quick Planning Checklist
- Motion type chosen (rotation, fold, slide, or combo)
- Target size measured against your own hand
- Target weight estimated from infill and perimeters
- Edge fillets planned at 1 mm minimum
- Texture depth kept at 1-2 mm
- Print-in-place or assembly decision made before modeling
Tolerances for Articulated 3D Prints
The right clearance for articulated 3D prints usually falls between 0.2 mm and 0.4 mm per side, though the exact figure depends on your printer, nozzle, and material. Too tight and the joint fuses. Too loose and it rattles.
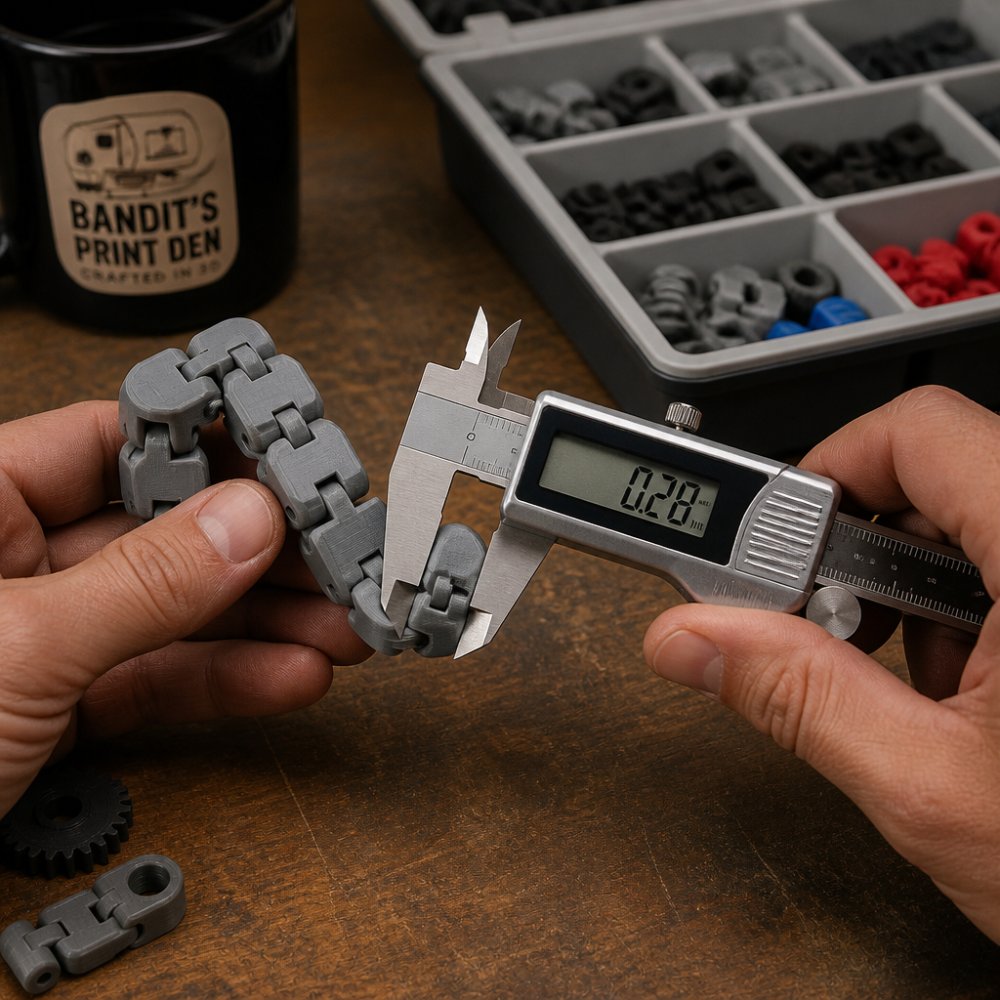
Start at 0.3 mm and adjust from there. PLA tends to print slightly oversized, so a 0.3 mm gap often behaves like 0.25 mm in practice. PETG is more forgiving but strings more, which can gum up tight clearances.
A few settings that directly affect whether your tolerances hold:
- Layer height: 0.2 mm is a solid balance of speed and detail
- Extrusion width: keep it consistent across the model
- Print orientation: joints print best when the gap runs vertically
- Infill density: 15-20% is plenty for most fidgets
From CAD File to Slicer: Print Settings That Matter
Export your model as an STL or 3MF, then check mesh integrity before slicing. Non-manifold geometry and flipped normals cause the slicer to invent walls that shouldn't exist, which ruins joint clearance.
In the slicer, a few settings decide whether your fidget works:
- Layer height: 0.16-0.2 mm for smooth joints
- Wall thickness: 2-3 perimeters for durability
- Infill: 15-20%, gyroid pattern for even strength
- Support structures: avoid them inside joints if you can
- Bed adhesion: a brim helps tall, thin articulated parts stay put
Print orientation matters more than most people realize. Rotate the model so joint gaps are vertical and the moving parts don't sag into each other. If a joint has to bridge, slow the bridge speed down.
Slice once, preview the layer-by-layer view, and look specifically at the joint gaps. If the slicer fills them in, fix the model, not the settings.
3D Printed Fidget Toys for Stress Relief
3D printed fidget toys for stress relief work because they give restless hands something to do without demanding attention. The tactile feedback of a smooth spin or a satisfying click redirects nervous energy, and a toy you designed yourself adds a layer of ownership that a mass-produced one can't.
The design choices that make a fidget calming are specific. Smooth rotation beats jerky movement. Consistent resistance beats a loose, rattling joint. Texture should be present but not sharp.
For a desk-friendly option, a compact spinner or a small articulated figure both work well. Bandit's Print Den's Infinity Cube Fidget Toy folds and flips continuously in the hand, and the SquishSpin Textured Sensory Fidget Spinner pairs a smooth spin with a textured surface for extra tactile input.

If you'd rather skip the design work entirely, our Mini Fidgets are fully articulated pocket-sized creatures, and the Songbird Water Whistle adds an auditory element that a lot of fidgets miss.

Testing, Iterating, and Finishing Your Fidget Toy
Test the print the moment it cools. Work every joint through its full range of motion by hand. If a joint is fused, you have three fixes: increase clearance, reduce flow, or reorient the part.
Iteration is normal, not failure. Most designers go through three or four versions before a fidget feels right. Change one variable at a time so you know what actually fixed the problem.
Post-processing comes last. Remove stringing with flush cutters, sand sharp edges with fine grit, and consider a light tumble for a smoother finish. If you printed in a color you don't love, a coat of primer and paint changes the look without affecting function.
A quick reference for common problems:
| Problem | Likely Cause | Fix |
|---|---|---|
| Joints fused solid | Clearance too tight | Increase gap to 0.35-0.4 mm |
| Joints rattle | Clearance too loose | Reduce gap by 0.05-0.1 mm |
| Stringing in gaps | Wet filament or high temp | Dry filament, drop nozzle temp |
| Warping at base | Poor bed adhesion | Add brim, raise bed temp |
| Rough surface | Fast print speed | Slow outer wall to 30-40 mm/s |
Designing a fidget toy that actually feels good takes iteration, and not everyone wants to spend a weekend dialing in tolerances. That's where Bandit's Print Den comes in. Our mobile 3D-printing studio, run out of a fifth-wheel workshop and overseen by our resident quality-control expert Bandit, produces articulated figures and desk companions with the joint feel and detail that make a fidget worth keeping. Every order ships fast, and orders over $35 ship free. Get started with Bandit's Print Den and add a custom print to your cart.
Frequently Asked Questions
How much does it cost to make a 3D printed fidget toy?
A small fidget toy uses roughly 10 to 30 grams of PLA filament, which costs about $0.25 to $0.75 at typical spool prices. Add electricity and machine wear and you are usually under $1 per print. If you would rather skip the trial and error, ready-made options like Bandit's Print Den's Mini Fidgets start at $5.00, with a buy 4, get 1 free deal applied at checkout.
What software is best for designing 3D printed fidgets?
Fusion 360 is the strongest free choice for parametric parts, which matters when you need to tweak clearances. Tinkercad works for a first simple spinner, Blender suits organic shapes, and OpenSCAD fits designers who prefer writing code. For most beginners, start with Tinkercad to learn the workflow, then move to Fusion 360 once you are adjusting tolerances for articulated 3D prints.
How do you ensure articulated parts move smoothly in 3D prints?
Leave a clearance of about 0.2 mm to 0.4 mm between moving surfaces, print in place with no supports inside the joint, and calibrate your extrusion so parts do not fuse. A 0.2 mm layer height with 15 to 20 percent infill keeps joints light enough to flex. If a joint sticks after printing, work it gently by hand rather than cutting it apart.
Do 3D printed fidget toys actually help with stress?
Many people use them the way they would use a worry stone: repetitive motion gives restless hands something to do during meetings, calls, or study sessions. The effect is personal, and a toy that feels satisfying to one person may feel wrong to another. That is exactly why designing your own matters, since you can tune the size, texture, and resistance until the fidget feels right in your hand.
0 comments