
Table of Contents
- Why Smooth 3D Printed Fidgets Matter
- What You'll Need Before You Start
- How to Remove Stringing from 3D Prints
- How to Sand 3D Prints for a Smooth Finish
- How to Smooth PLA 3D Prints Without Damaging Moving Parts
- 3D Printer Settings for Fidget Toys
- Common Mistakes to Avoid When Smoothing Fidgets
- Testing and Finishing Your Smoothed Fidget
- Frequently Asked Questions
Last Updated: October 5, 2026
Why Smooth 3D Printed Fidgets Matter
A rough 3D printed fidget doesn't just look unfinished, it feels wrong in your hand, whereas a smooth 3D printed fidget transforms the entire experience. Layer lines catch your skin. Spiky surfaces snag on fabric.
Smoothing also protects the fidget: rough edges wear faster, stringing can tear, and a properly finished print lasts longer and feels premium.
The good news: you don't need fancy equipment or hours of work. A few simple tools and the right technique get you 90% of the way there.
What You'll Need Before You Start
Safety Gear and Protective Equipment
Smoothing creates dust and particles. Protect yourself with safety glasses, an N95 dust mask, gloves if needed, and a well-ventilated workspace.
Rinse thoroughly after smoothing to remove dust and loose particles, especially important for fidgets handled by children.
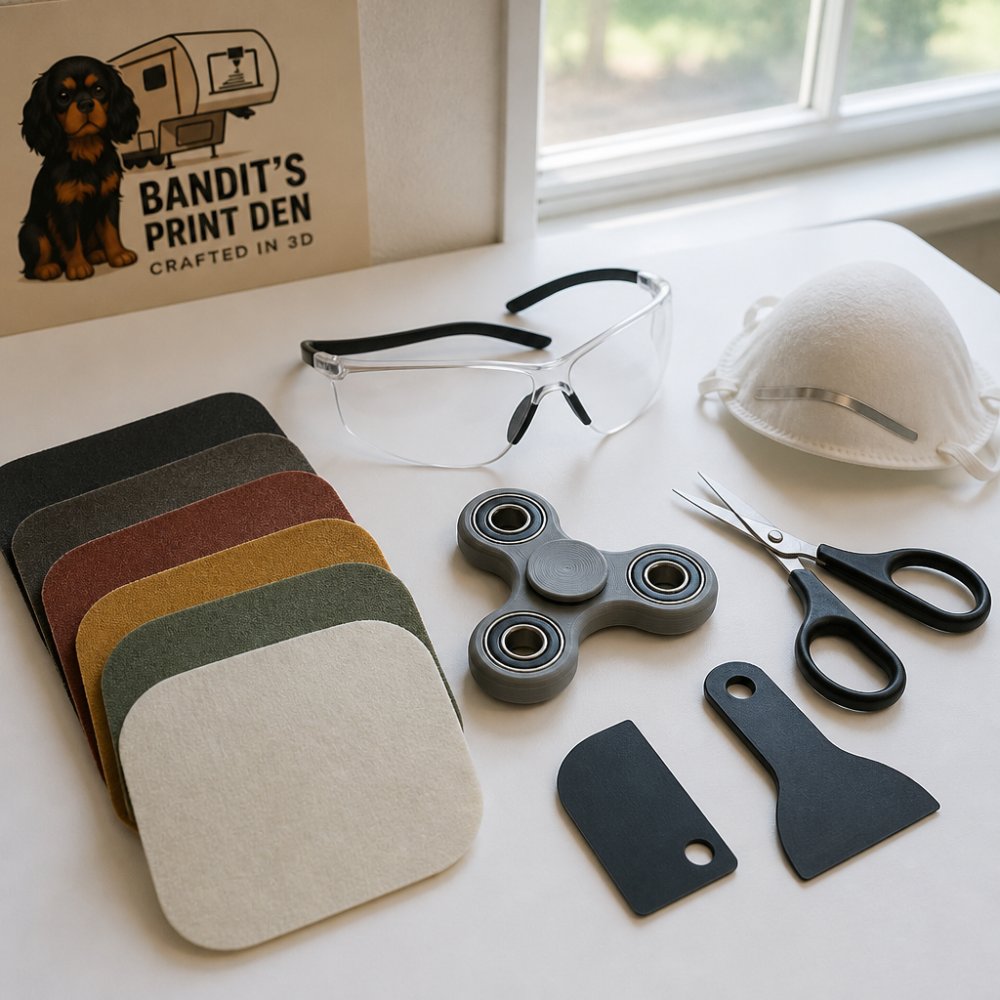
Tools and Materials for Different Defects
For stringing and wisps:
- Small scissors or craft knife
- Tweezers for grabbing fine strands
For rough surfaces and layer lines:
- Sandpaper in multiple grits (80, 120, 220, 400)
- Sanding sponges or pads (easier to control than flat sandpaper)
- Fine steel wool (0000 grade) for final polishing
For tight spaces and small details:
- Needle files or small hand files
- Emery boards (yes, nail files work)
- Toothpicks for scraping corners
For moving parts:
- Plastic-safe lubricant (silicone spray works, but test first)
- Small brush to clear debris from gears
Start with sandpaper in three grits (120, 220, 400) and scissors; add specialized tools as needed.
How to Remove Stringing from 3D Prints
Identifying and Assessing Stringy Lines
Stringing appears as thin plastic hairs between parts when the nozzle moves without extruding. On fidget spinners, wisps connect the outer ring to the center or between moving parts.
Focus on stringing that connects moving parts, feels rough, catches on clothing, or blocks movement. Heavy stringing jams moving parts; light stringing is cosmetic.
Removing Stringing by Hand and with Scissors
Pull wisps by hand first, many snap clean. For tougher strands, cut close to the base with scissors, pull gently with tweezers, then sand the nub smooth. Work slowly to avoid cracking the print.
For moving parts, unwrap stringing gently before cutting, a strand caught in a joint can jam the fidget. After removal, sand remaining bumps smooth with 220-grit paper.
How to Sand 3D Prints for a Smooth Finish
Choosing the Right Grit Progression
Grit progression matters: jumping from 80-grit to 400-grit leaves visible scratches. Work your way up gradually.
Start with the coarsest grit that matches your problem:
- 80-120 grit: Heavy layer lines, warping, major surface imperfections
- 120-220 grit: Standard layer lines on most prints
- 220-400 grit: Final smoothing and polishing
- 400+ grit: High-gloss finishes (optional for fidgets)
Sand with 120-grit to remove layer lines, then 220-grit, then 400-grit for a smooth satin finish. Each grit removes scratches from the previous one.
Sanding Flat and Curved Surfaces
On flat areas, use a sanding block and cross-hatch to ensure even coverage. On curved surfaces, use a flexible sanding sponge with light circular motions. Avoid aggressive sanding, which rounds edges and damages joints.
Sand outer surfaces first, then carefully work around moving parts using a toothpick to access tight spaces safely.
How to Smooth PLA 3D Prints Without Damaging Moving Parts
Breaking In Print-in-Place Gearsets and Rings
Print-in-place fidgets have stiff moving parts that need breaking in. Flex and rotate all parts gently by hand for 2-3 minutes daily for a week. Don't force anything.
Warm water (below 140°F) can help loosen tight joints. If sticking persists after breaking in, use a small file to carefully smooth rough spots inside the joint, working from the outside.
Heat and Cold Methods: When and How to Use Them
Warm water (140-160°F for 30-60 seconds) can slightly smooth surfaces. For fidgets with moving parts, avoid heat methods entirely, they can fuse joints or warp gears. Stick to mechanical sanding instead.
The best approach is mechanical: sanding and hand-smoothing. It's slower but safer and more reliable.
3D Printer Settings for Fidget Toys
Smoothing is easier and faster if the print quality is good from the start. Fidgets have unique challenges, moving parts that jam if rough, thin walls that warp, and curved surfaces that show layer lines. Tuning your printer for these constraints reduces post-processing work by 50% or more.
Defect-to-Setting Guide: Fix Problems Before They Print
Problem: Heavy stringing on moving parts (gears, rings, joints)
Stringing wraps around gears and jams movement. Prevention is faster than cleanup.
- Lower nozzle temperature by 5-10°F. Hotter plastic is more fluid and strings more. Start at your material's recommended temperature minus 5°F (e.g., 195°C for PLA instead of 200°C) and test. Too cold and the print won't stick to the bed or layer adhesion suffers.
- Enable retraction (most slicers default to this on). Retraction pulls the filament back when the nozzle moves without extruding, preventing ooze. If stringing persists, increase retraction distance by 0.5mm (typical: 4-5mm for Bowden extruders, 1-2mm for direct drive).
- Reduce print speed by 10-20%. Slower extrusion gives the nozzle time to stop before moving. If your fidget prints at 50mm/s, try 40mm/s. Don't go below 30mm/s or layer adhesion and wall strength suffer.
- Increase nozzle-to-part cooling. If your printer has a part cooling fan, increase it to 80-100% during the print. Better cooling hardens plastic faster, reducing ooze.
Problem: Visible layer lines on curved surfaces (spinner rings, cube faces)
SquishSpin 2" Textured Sensory Fidget Spinner | Bandit’s Print Den →
Layer lines are cosmetic but catch fingers and feel rough.
- Reduce layer height to 0.1mm (from the standard 0.2mm). Thinner layers mean more of them, so lines are shallower and less visible. Prints take 2× longer but look dramatically better. For fidgets, 0.1mm is worth the time.
- Use a smaller nozzle (0.3mm instead of 0.4mm). Smaller nozzles extrude thinner lines, reducing layer visibility. This requires slower speeds and more careful tuning, but the surface quality is noticeably better.
- Increase infill density slightly (to 15-20% instead of 10%). More internal structure reduces warping and surface irregularities.
Problem: Warped or thin walls on fidget bodies
Thin walls warp during cooling, creating stress points that break during use or smoothing.
- Lower bed temperature by 5-10°F. Slower cooling reduces warping. For PLA, try 50-55°C instead of 60°C. For PETG, try 70-75°C instead of 80°C.
- Increase wall thickness in your slicer. If your fidget has 1mm walls, increase to 1.5-2mm. Thicker walls are stronger and warp less. They add weight and material cost but improve durability.
- Use a brim or raft. These temporary structures help prints stick without warping. They add material to remove, but the print quality improves, especially on thin-walled fidgets.
- Reduce print speed to 30-40mm/s. Slower extrusion gives plastic time to cool evenly, reducing internal stress and warping.
Problem: Rough seams or blobs on layer transitions
Seams and blobs catch fingers and look unfinished.
- Enable "Seam Position" in your slicer (most slicers call this "Z-seam alignment"). Set it to "Random" or "Sharpest Corner" so seams don't all line up in one visible spot. Randomizing seams makes them less noticeable.
- Reduce extrusion width slightly (to 0.35-0.4mm instead of 0.5mm). Narrower extrusion lines create smoother transitions and less blob buildup.
- Lower nozzle temperature by 5°F to reduce ooze at layer transitions.
Print Orientation and Placement
How you orient the fidget on the bed affects surface quality and support removal.
- Orient moving parts vertically (gears, rings, joints perpendicular to the bed). This minimizes layer lines on curved surfaces and reduces support contact.
- Avoid placing seams on high-touch surfaces. If your spinner has a seam, orient it so the seam is on the bottom or side, not on the top where your fingers rest.
- Use tree supports instead of linear supports (if your slicer offers them). Tree supports use less material, are easier to remove, and leave smaller marks.
Testing and Iteration
Printer tuning is iterative. Print a small test fidget (a 2-inch spinner or cube) and inspect it:
- Check for stringing: Look at moving parts and tight spaces. If heavy stringing is present, lower temperature or increase retraction.
- Feel for layer lines: Run your fingers over curved surfaces. If lines are deep, reduce layer height or nozzle temperature.
- Inspect for warping: Look at the edges and thin walls. If warping is visible, lower bed temperature or increase wall thickness.
- Test movement: Flex and rotate all moving parts. If they're stiff or grinding, there's likely stringing inside the joint, lower temperature and retest.
Make one change at a time and test. This tells you which setting actually fixed the problem. After 2-3 test prints, your fidget quality will improve dramatically, and post-processing smoothing becomes optional rather than essential.
Common Mistakes to Avoid When Smoothing Fidgets
Sanding too aggressively. You'll thin walls, round edges, and damage moving parts.
Skipping grit progression. Jump from 80-grit to 400-grit and you'll see deep scratches.
Forcing stuck joints. A stiff print-in-place fidget needs breaking in, not brute force.
Sanding moving parts directly. You'll jam gears or snap thin walls.
Ignoring dust and debris. Particles inside a fidget jam movement.
Using the wrong tools. A power sander is overkill and dangerous on small fidgets.
Heat smoothing fidgets with moving parts. Heat can fuse joints or warp gears.
Testing and Finishing Your Smoothed Fidget
After smoothing, test the fidget before you consider it done.
Check the feel: Run your fingers over every surface.
Test movement: Flex, spin, and rotate all moving parts. They should move smoothly without grinding or sticking.
Look for damage: Inspect the print for cracks, thin spots, or areas where you sanded too far.
Clean thoroughly: Rinse under warm water and dry completely. Remove all sanding dust and debris.
Once everything passes inspection, your fidget is ready. A smoothed 3D printed fidget feels premium and works reliably.
If you're looking for fidgets that arrive pre-smoothed and ready to use, Bandit's Print Den offers a range of finished articulated fidgets like the Flexi Manta Ray and the SquishSpin 2" Textured Sensory Fidget Spinner.


Frequently Asked Questions
Can you sand a 3D-printed fidget toy without breaking its moving parts?
Yes, but with care. Avoid sanding directly across articulated joints, inner rings, or gearsets. Sand the outer flat surfaces and edges first using light pressure and a low grit (220-400). For print-in-place parts, gently work around them with hand tools like small files or scrapers instead of power sanders. Break in moving parts slowly by hand before heavy smoothing to ensure they stay loose.
What is the best way to smooth PLA fidget toys?
Start by removing stringing with scissors or a craft knife, then progress through sanding grits: begin with 120-150 grit to remove layer lines, move to 220-400 grit for smoothing, and finish with 600+ grit for a polished feel. For PLA specifically, avoid prolonged heat (over 60°C) which can warp the print. Hand sanding gives you the most control around moving parts. Test the fidget's movement frequently during the process.
How do you remove stringing from a 3D-printed fidget?
Stringy lines are thin plastic wisps between parts. Use small scissors, a craft knife, or a specialized stringing removal tool to carefully cut them away. Hold the fidget steady and cut at a shallow angle to avoid gouging the surface. For tight spaces, a fine-tipped tweezers helps pull away loose strands. After removal, lightly sand the area with 220-grit sandpaper to smooth any rough spots left behind.
Why should I smooth a 3D printed fidget if it already works?
Smoothing improves both feel and durability. Layer lines and rough surfaces catch on skin and clothing, making the fidget less satisfying to use. Stringing can snag and break off. A smooth surface also reduces wear on your hands during extended fidgeting. Plus, a finished fidget looks more professional and polished, important if it's a gift or display piece. Smoothing extends the fidget's lifespan by reducing stress points on articulated joints.
Smoothing a 3D printed fidget takes patience and the right tools, but the result is worth it. A smooth fidget feels better, lasts longer, and looks finished. Whether you're smoothing your own prints or learning the process, these techniques work across all fidget types and materials. Start with sanding, progress through grits, and test as you go. Your fidgets will thank you.
0 comments