
Table of Contents
- How to Order Custom 3D Prints: The Complete Process
- How to Design Custom 3D Items for Printing
- Choosing the Right 3D Printing Material
- Using a 3D Printing Cost Calculator
- Uploading Your File and Getting an Instant Quote
- Lead Times, Shipping, and Receiving Your Print
- Cost-Saving Strategies for Custom 3D Printing
- Common Mistakes to Avoid When Ordering
- Frequently Asked Questions
Last Updated: August 30, 2026
How to Order Custom 3D Prints: The Complete Process
Ordering custom 3D prints has become straightforward, but the process involves more decisions than most people expect. From uploading your design file to choosing materials and print settings, understanding each step helps you get exactly what you want, on time and within budget. At Bandit's Print Den, we guide customers through this entire workflow, helping them navigate everything from file preparation to final delivery.
The core process is simple: design or source a file, choose your material and quality settings, upload to a provider, receive an instant quote, and wait for delivery. But each of these steps contains choices that directly impact your final product's quality, cost, and timeline. This guide walks you through how to order custom 3D prints with confidence, covering the technical decisions and practical considerations that separate a successful print from a disappointing one.
How to Design Custom 3D Items for Printing
Creating or sourcing a 3D CAD file is the foundation of every custom 3D printing project. Your design determines everything that follows: material choice, print time, cost, and final quality. Whether you're designing from scratch or sourcing an existing file, understanding what makes a print-ready design is essential.
Creating or sourcing your 3D CAD file
Start by deciding whether you'll design the item yourself or find an existing design. If you're designing from scratch, you'll need CAD software. Many professionals use industry-standard tools, though beginner-friendly options exist as well. The key is creating geometry that's actually printable, meaning the design accounts for the physical constraints of 3D printing technology.
If sourcing an existing design, websites like Thingiverse, MyMiniFactory, and Printables host thousands of free and paid 3D models. These designs have often been tested by other users, which reduces the risk of printing failures. When downloading, look for files that explicitly mention successful prints or positive user feedback.
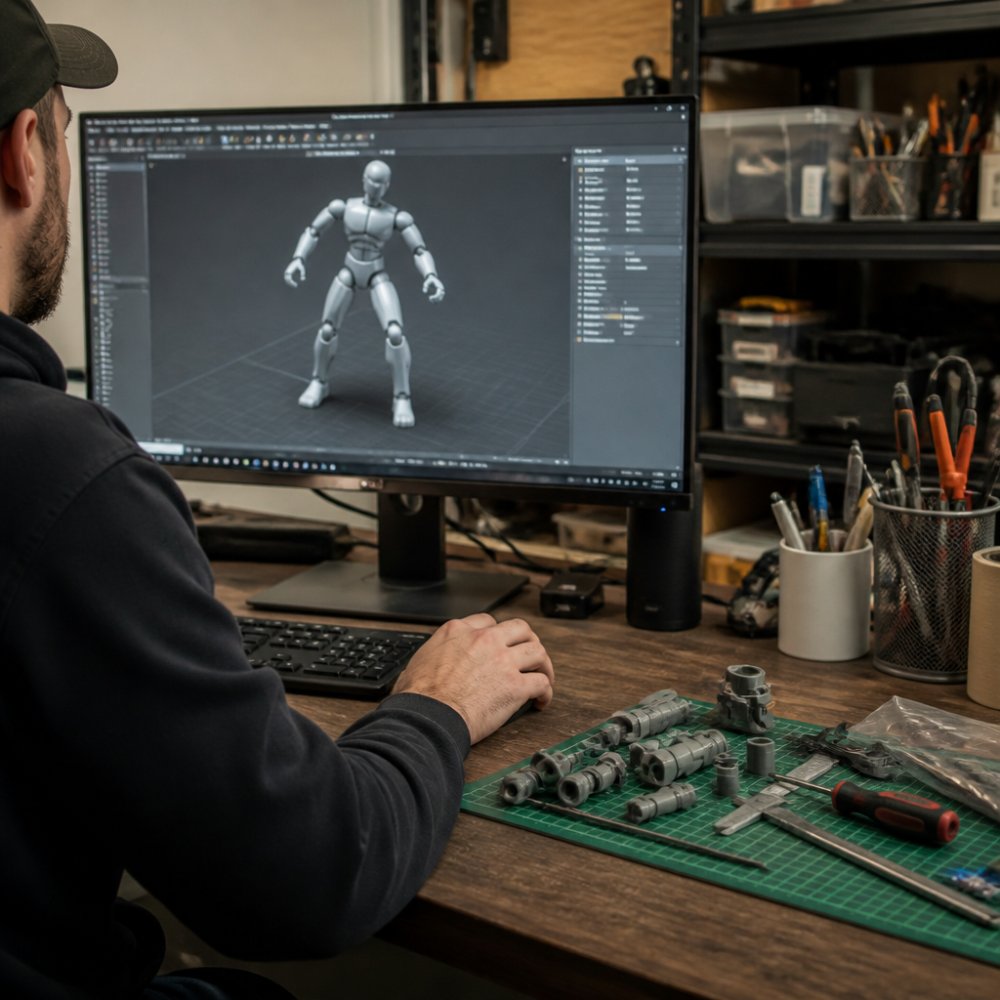
The critical factor is ensuring your design is manifold, meaning it has a closed, watertight surface with no gaps, holes, or intersecting geometry. Non-manifold geometry causes printing failures. Most 3D printing services, including Bandit's Print Den, validate your file before printing and flag any issues that need repair.
File formats and mesh repair
The most common file format for 3D printing is STL (Stereolithography), which stores your design as a mesh of triangles. Other formats like OBJ and STEP are also widely supported. When uploading your file, check what formats your printing service accepts, most modern providers handle multiple formats without issue.
Mesh repair becomes necessary when your design has errors: missing faces, non-manifold geometry, or intersecting surfaces. Some 3D printing services offer automatic repair tools that fix minor issues. For more complex repairs, dedicated mesh-repair software can help, though many providers include this as part of their pre-print validation process.
When you upload to Bandit's Print Den or another service, the platform scans your file and alerts you to any problems. This happens before you're charged, so you can fix issues without cost. Understanding what makes a file print-ready saves you time and prevents failed prints.
Choosing the Right 3D Printing Material
Material choice shapes the entire character of your finished print. Different printing technologies use different materials, each with distinct properties affecting strength, flexibility, surface finish, and cost. Understanding your options prevents ordering something that doesn't meet your needs.
FDM vs. SLS vs. resin printing
FDM (Fused Deposition Modeling) is the most common and affordable 3D printing technology. It works by heating thermoplastic filament, typically PLA or ABS, and extruding it layer by layer. FDM prints are durable and suitable for functional parts, desk accessories, and display pieces. The trade-off is visible layer lines on the surface, though post-processing can minimize this.
SLS (Selective Laser Sintering) uses a laser to fuse powder particles together, layer by layer. SLS produces stronger, more detailed parts than FDM and requires no support structures. This makes it ideal for complex, articulated designs like the figures Bandit's Print Den specializes in. SLS is more expensive than FDM but delivers superior detail and part strength.
Resin printing uses liquid photopolymer resin cured by UV light. It produces extremely fine detail and smooth surfaces, making it popular for miniatures and highly detailed collectibles. Resin prints are brittle compared to FDM or SLS parts, so they're best suited for display pieces rather than functional items.
Material properties and part strength
Your choice of material determines how your finished print performs. PLA filament is beginner-friendly, biodegradable, and produces good detail, but it's less durable than ABS. ABS is stronger and more heat-resistant, making it better for functional parts that experience stress or temperature changes. Nylon, another FDM option, offers exceptional strength and flexibility.
For SLS printing, nylon is the standard material. It produces strong, detailed parts suitable for articulated figures that need to withstand repeated movement and handling. This is why Bandit's Print Den uses SLS for articulated collectibles, the material properties deliver the durability and detail that customers expect.
Consider your intended use. A decorative desk buddy needs different material properties than a functional mechanical part. Articulated figures need flexibility at joints and overall strength. Understanding these trade-offs helps you choose the material that actually meets your needs, rather than discovering after printing that your part is too brittle or too flexible.
Using a 3D Printing Cost Calculator
Most 3D printing services offer instant cost calculators that estimate your price based on material, volume, and print settings. These calculators are essential for budgeting and comparing options before committing to an order.
When you upload your file, the calculator typically factors in material weight or volume, print time, and your chosen quality settings. Some services charge per gram of material, others per cubic centimeter, and some use a hybrid model. Understanding how pricing works at your chosen provider prevents surprises at checkout.
Bandit's Print Den offers transparent pricing that accounts for material, complexity, and turnaround time. Free shipping on orders over $35 makes small custom projects more affordable. Using the cost calculator before uploading helps you decide whether to adjust your design, perhaps reducing infill percentage or choosing a different material, to hit your budget target.
Uploading Your File and Getting an Instant Quote
The upload process is where your design becomes a real order. Most 3D printing services have straightforward upload portals that validate your file automatically and generate a quote within seconds.
Upload portal and file validation
Navigate to the upload portal on your chosen provider's website. Drag and drop your STL, OBJ, or STEP file into the designated area. The system immediately scans your file for errors: non-manifold geometry, missing faces, insufficient wall thickness, or unsupported overhangs. If errors are found, you'll receive specific feedback about what needs fixing.
Most providers, including Bandit's Print Den, flag issues before charging you. This validation step is crucial, it prevents you from paying for a print that will fail. If your file has minor issues, many services offer automatic repair. For more complex problems, you may need to revise your design or contact support for guidance.
Layer height, infill percentage, and print orientation
Once your file validates, you choose print settings that directly affect quality, strength, and cost. Layer height determines how thin each printed layer is, smaller layer heights (0.1mm) produce finer detail but take longer and cost more. Larger layer heights (0.2mm or 0.3mm) print faster and cost less but show more visible layering.
Infill percentage controls how solid your part is internally. 100% infill makes a completely solid part, which is heavy and expensive. 20% infill creates a honeycomb structure inside, reducing material and cost while maintaining strength for most applications. For display pieces, 10-15% infill is often sufficient. For functional parts that experience stress, 20-30% is typical.
Print orientation affects support structures, surface finish, and print time. Some orientations require more support material (which increases cost), while others produce better surface quality on visible faces. Most 3D printing services auto-orient your file for optimal results, but you can manually adjust if you have specific preferences.
These settings are where you balance quality, strength, and cost. Understanding the trade-offs lets you make informed decisions rather than defaulting to the most expensive option.
Lead Times, Shipping, and Receiving Your Print
After placing your order, understanding realistic timelines and shipping logistics prevents frustration and disappointment.
Most 3D printing services quote lead times based on current queue and complexity. Simple prints might ship in 2-3 business days, while complex orders with custom settings may take 5-10 business days. Bandit's Print Den prioritizes fast shipping, getting orders out quickly without compromising quality. For time-sensitive orders, confirm lead times before placing your order.
Shipping typically uses standard ground carriers. Most providers offer free or discounted shipping on orders over a certain threshold, Bandit's Print Den includes free shipping on orders over $35. Tracking information is provided so you know exactly when your print arrives.
When your print arrives, inspect it immediately. Check for layer lines, warping, or surface imperfections. Most quality issues are visible within the first few hours of receiving. If something looks wrong, contact your provider within a reasonable window, typically 7-14 days, to discuss replacement or refund options. Reputable providers stand behind their work.
Cost-Saving Strategies for Custom 3D Printing
Ordering custom 3D prints doesn't have to be expensive. Understanding where costs come from helps you make strategic choices that reduce price without sacrificing quality.
Reduce material volume by lowering infill percentage. Most prints don't need 100% infill. Dropping from 50% to 20% infill can cut material cost by 40% or more while maintaining adequate strength for display pieces. Articulated figures benefit from moderate infill (20-25%) that balances weight and durability.
Choose standard materials over specialty options. Basic PLA and ABS cost less than specialty filaments like carbon-fiber-reinforced or flexible TPU. For most projects, standard materials deliver excellent results. Reserve specialty materials for specific functional requirements.
Batch orders together. If you're ordering multiple items, combining them into one print job often reduces per-unit costs. Some providers offer volume discounts, and consolidating shipping saves money. Bandit's Print Den's free shipping threshold of $35 incentivizes bundling smaller items.
Optimize file size and complexity. Simpler designs print faster and use less material. Reducing unnecessary detail, hollowing out solid sections where possible, and removing internal geometry you don't need all lower costs. This doesn't mean sacrificing quality, it means being intentional about what geometry actually serves your design.
Choose standard quality settings over premium options. Most applications look excellent with standard layer height (0.2mm) and moderate infill. Premium settings (0.1mm layer height, high infill) cost significantly more and aren't always necessary. Reserve premium settings for display pieces where fine detail matters.
Common Mistakes to Avoid When Ordering
Understanding common pitfalls prevents costly errors and disappointment.
Uploading non-manifold geometry is the most common mistake. A design that looks perfect in CAD might have hidden errors, small gaps, internal faces, or intersecting surfaces, that cause printing to fail. Always validate your file before uploading, and don't assume a design from an online repository is error-free. Run it through a mesh-repair tool if you're unsure.
Choosing the wrong material for your intended use creates regret. Resin prints are beautiful but brittle, they're not suitable for articulated figures that get handled repeatedly. FDM prints with high infill are heavy and expensive, not necessary for decorative items. Match material and settings to actual use.
Ignoring print orientation and support structures wastes money. Poor orientation requires excessive support material, inflates cost, and can produce rough surfaces where supports were attached. Most services auto-orient well, but understanding this choice prevents overpaying for a suboptimal setup.
Underestimating lead time causes missed deadlines. Don't assume a print will arrive in 2 days if you need it by a specific date. Check quoted turnaround before ordering, and factor in shipping time. Bandit's Print Den provides realistic timelines upfront, but always confirm before placing a time-sensitive order.
Ordering without understanding file requirements leads to failed prints. Not all files are print-ready. Wall thickness, overhang angles, and support requirements vary by technology. Review your provider's design guidelines before finalizing your file. A few minutes of preparation prevents a wasted order.
Choosing a provider solely on price sacrifices quality. The cheapest option often cuts corners on quality control, material, or post-processing. Bandit's Print Den's reputation for detail and customer service reflects genuine quality, not just competitive pricing. Paying slightly more for a provider you trust delivers better results and fewer headaches.
Ordering custom 3D prints is a skill that improves with each project. The process becomes intuitive once you understand file preparation, material choices, and print settings. When you're ready to bring your design to life, Bandit's Print Den handles the technical complexity while you focus on your vision. Our team validates your files, guides material selection, and delivers articulated figures and custom projects with exceptional detail and fast shipping. Start your next project with a free instant quote, upload your file and see exactly what your print will cost before committing to anything.
Frequently Asked Questions
Q: Can I order a custom 3D print if I don't have a 3D file?
A: Yes. If you don't have a CAD file, you can describe your idea in detail, dimensions, features, articulation points, and the print service can help you source or create one. Many services also accept sketches or reference images. Be specific about what you want: is it a desk buddy, articulated figure, or functional part? The more detail you provide, the better the final result will match your vision.
Q: How much does it cost to custom 3D print something?
A: Cost depends on material, size, complexity, and print quality settings. Use a 3D printing cost calculator to get an instant quote based on your file and specifications. Factors that affect price include layer height (finer resolution costs more), infill percentage (solid prints cost more than hollow ones), and material choice. Bandit's Print Den offers free shipping on orders over $35, which can offset smaller project costs.
Q: What's the difference between FDM and SLS 3D printing?
A: FDM (Fused Deposition Modeling) uses thermoplastic filament extruded in layers, it's affordable but can show visible layer lines. SLS (Selective Laser Sintering) uses powder and produces stronger, more detailed parts without support structures, but costs more. Resin printing offers the finest detail for small, intricate models. Choose based on your budget, part strength needs, and surface finish requirements. Articulated figures and desk accessories typically work well with FDM or resin.
Q: How long does it take to receive a custom 3D print?
A: Lead times vary by complexity and current order volume. Simple prints ship faster than production-grade or highly detailed custom work. Once your file is uploaded and quote accepted, you'll receive an estimated lead time. Bandit's Print Den prioritizes fast shipping and has delivered orders before customers' anticipated dates. For time-sensitive orders, confirm lead times before placing your order.
This article was written using GrandRanker
0 comments